
How to Use the Translation Features of Word
Knowing how to use the translation features of Wordis useful when text or an entire document needs to reach readers in another language without leaving Word. Microsoft Word includes built-in translation tools that can translate selected text, translate a full document into a new file, and control basic translator preferences from the Review tab.
This guide explains where to find Translate in Word, how to translate selected text, how to translate a whole document, how to copy or insert translated text correctly, how to adjust translator preferences, and how to solve common translation problems.
Where to Find Translation in Microsoft Word
Section titled “Where to Find Translation in Microsoft Word”All translation tools in Microsoft Word are located on the Review tab. This is the starting point for translating a selection of text, translating a complete document, or changing translator preferences.
Step 1: Open the Translate Menu
- Open the Word document.
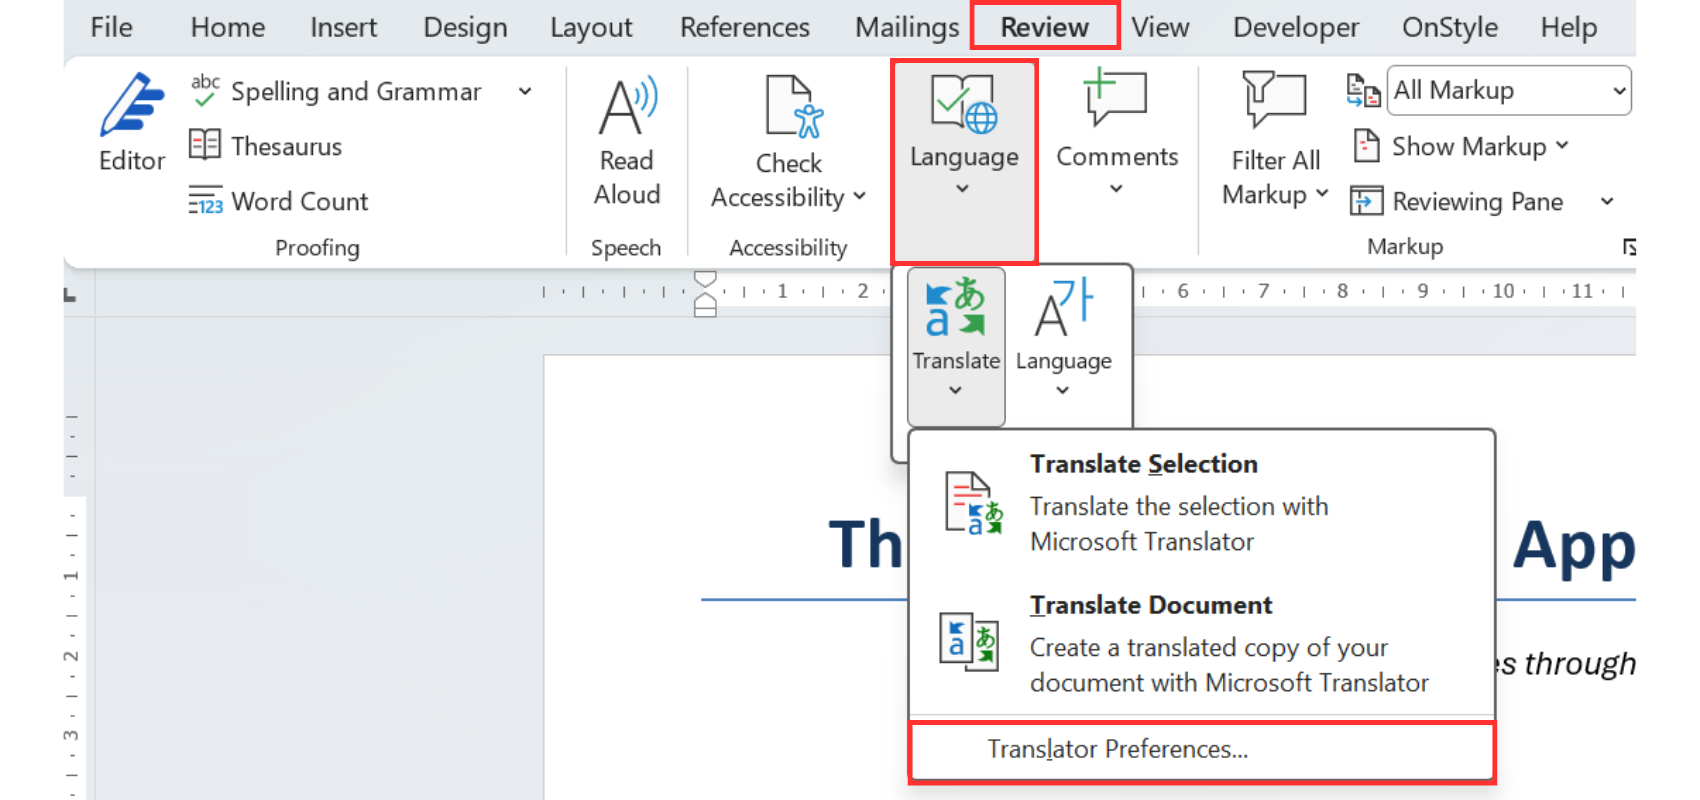
- On the Review tab of the Ribbon, go to the Language group.
- Select Translate.
The Translate drop-down menu shows three main options:
- Translate Selection.
- Translate Document.
- Translator Preferences.
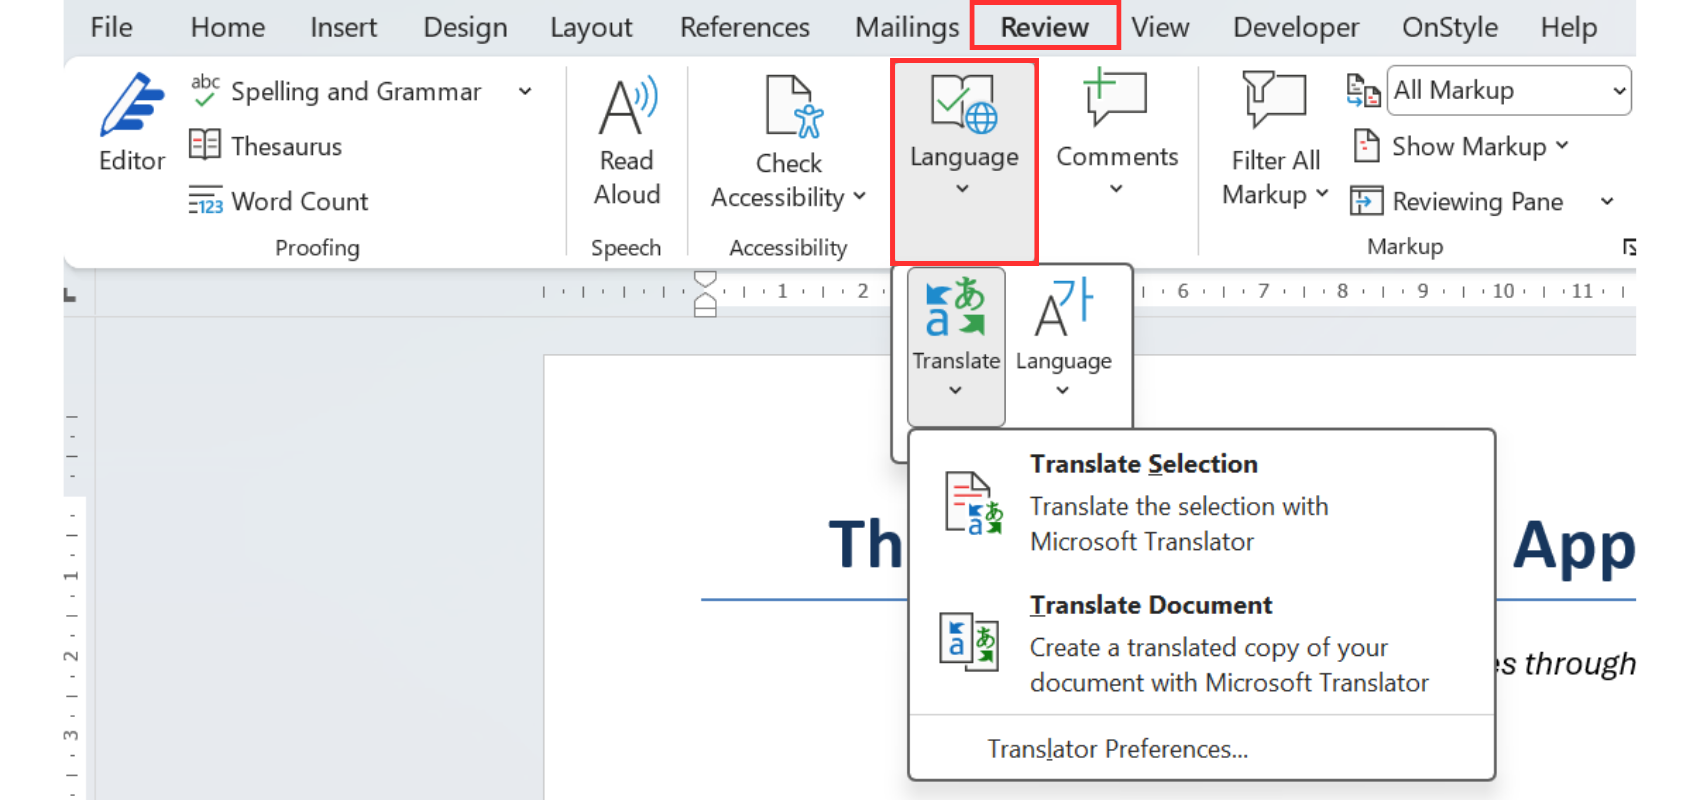
Knowing how to use the translation features of Word starts with choosing the correct option. Use Translate Selection when only part of the document should change, and use Translate Document when the entire file should be translated into a separate document.
How to Translate Selected Text in Word
Section titled “How to Translate Selected Text in Word”The fastest way to translate text in Word is to translate selected text. This is useful for one word, one sentence, one paragraph, or a short section that needs to be translated without changing the whole document.
Step 1: Select the Text to Translate
- Select the word, sentence, paragraph, or section that should be translated.
The selected text is the content Word will use in the translation panel. If no text is selected, Word can show a translation, but it cannot replace selected text directly.
Step 2: Open Translate Selection
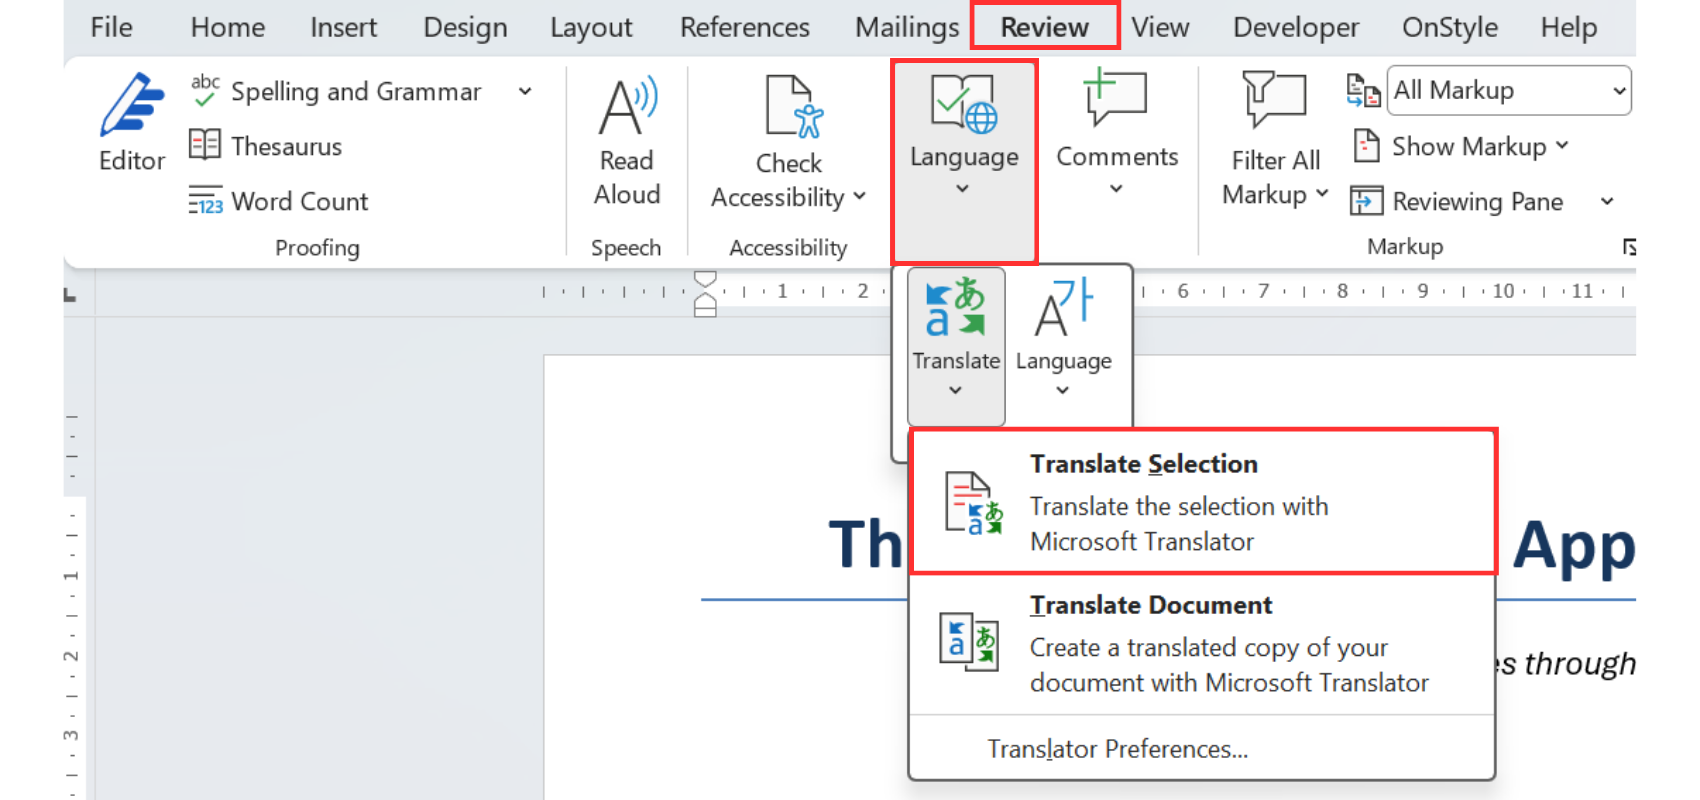
- On the Review tab of the Ribbon, select Translate.
- Select Translate Selection.
The Translator pane opens on the right side of the Word window. The upper box shows the original text, and the lower box shows the translated result.
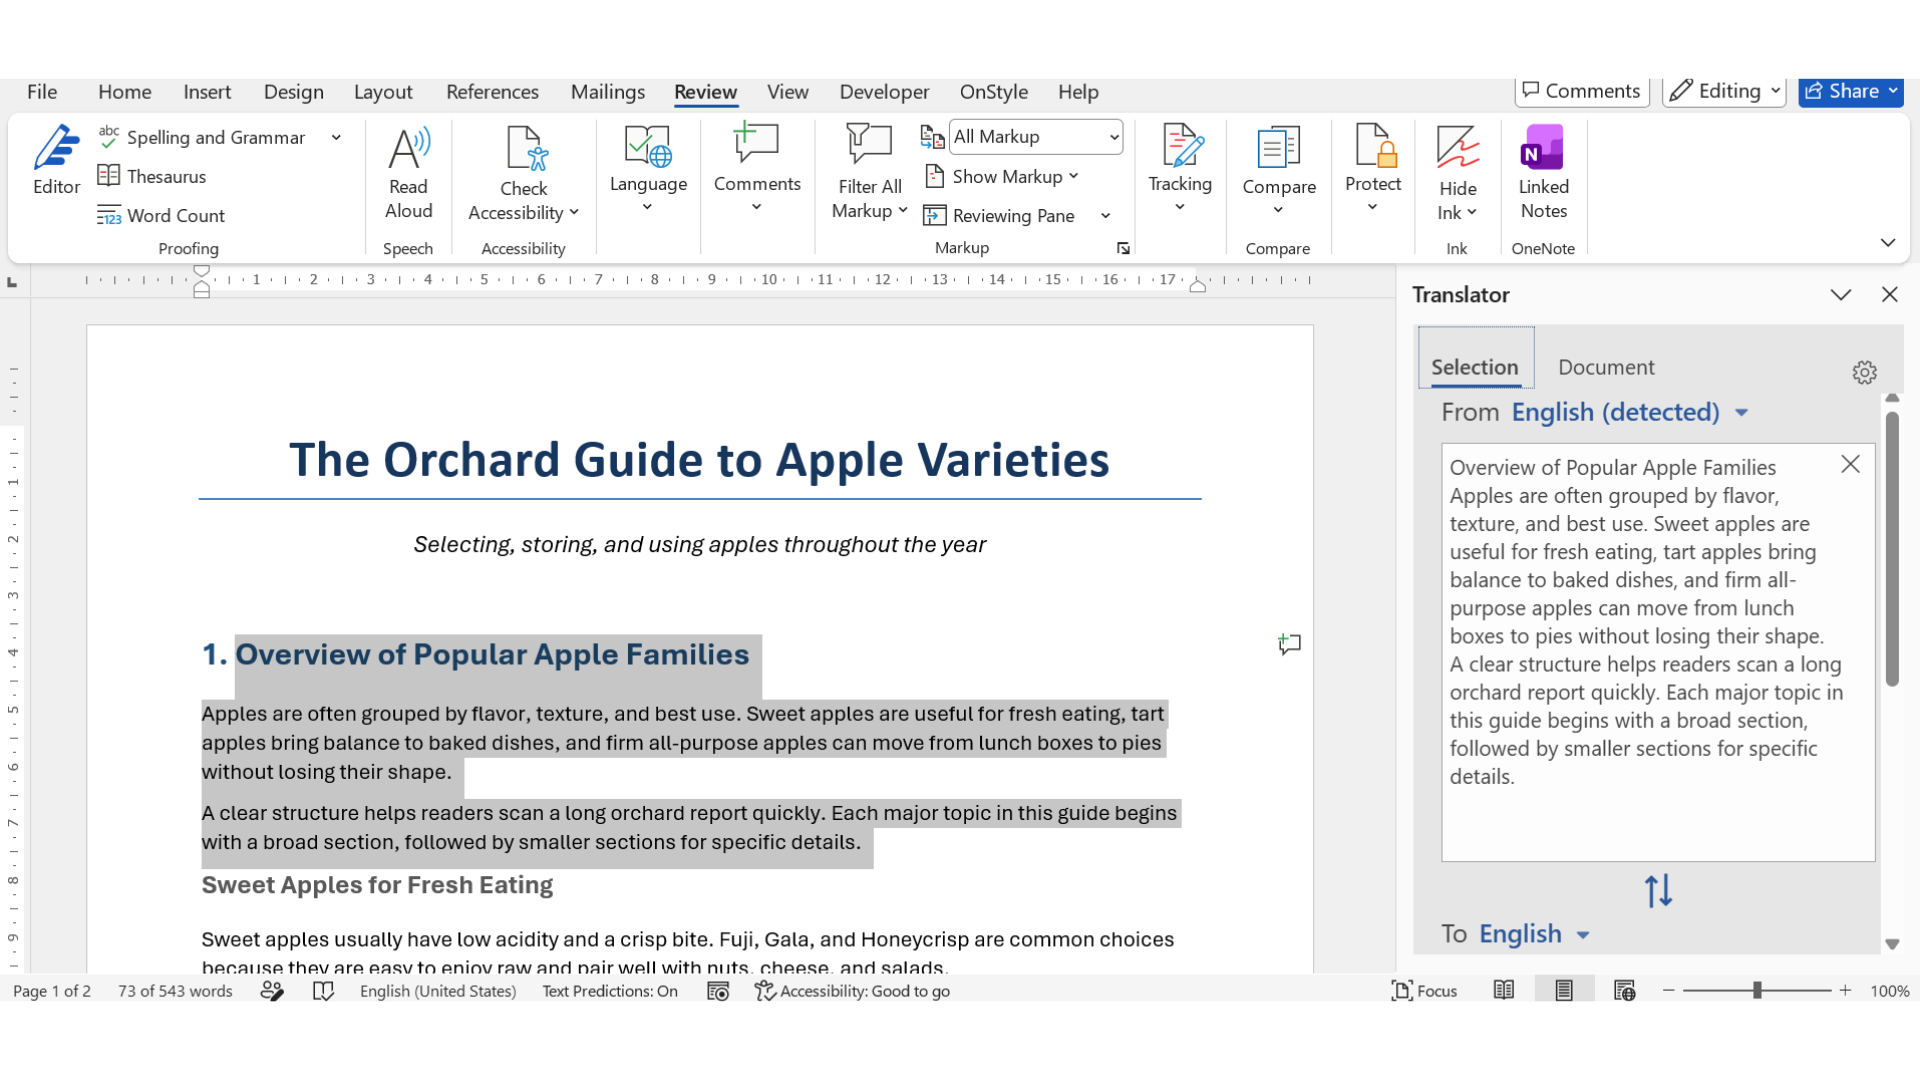
Step 3: Check the Source Language
Word usually detects the source language automatically. If the source language is detected incorrectly, open the Language drop-down menu in the upper part of the Translator pane and select the correct source language manually.
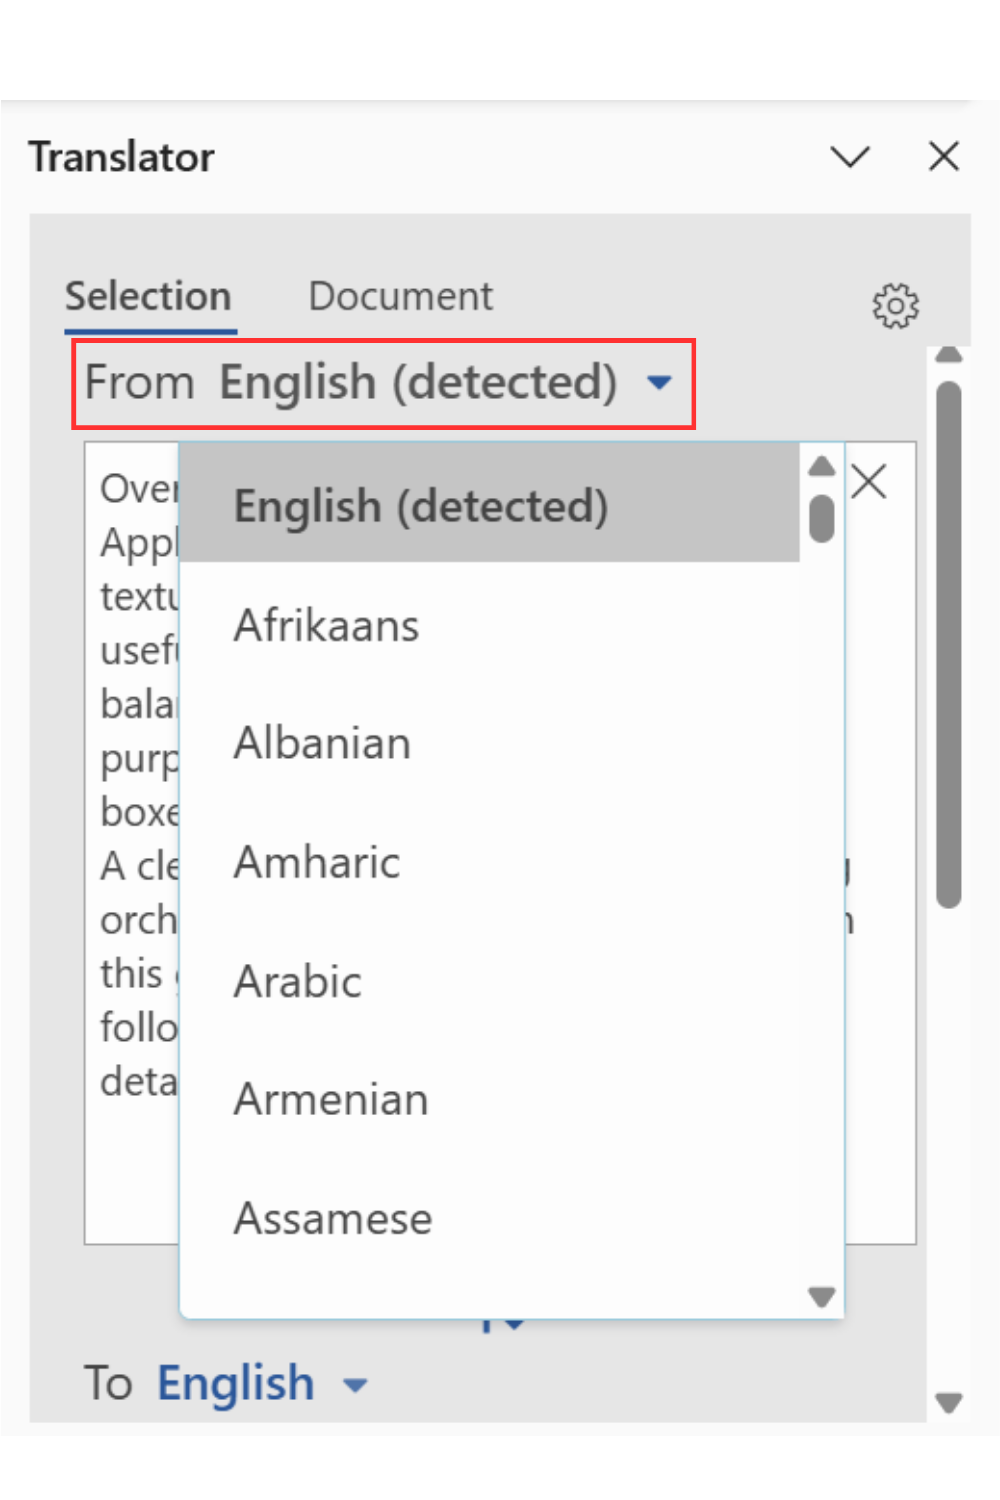
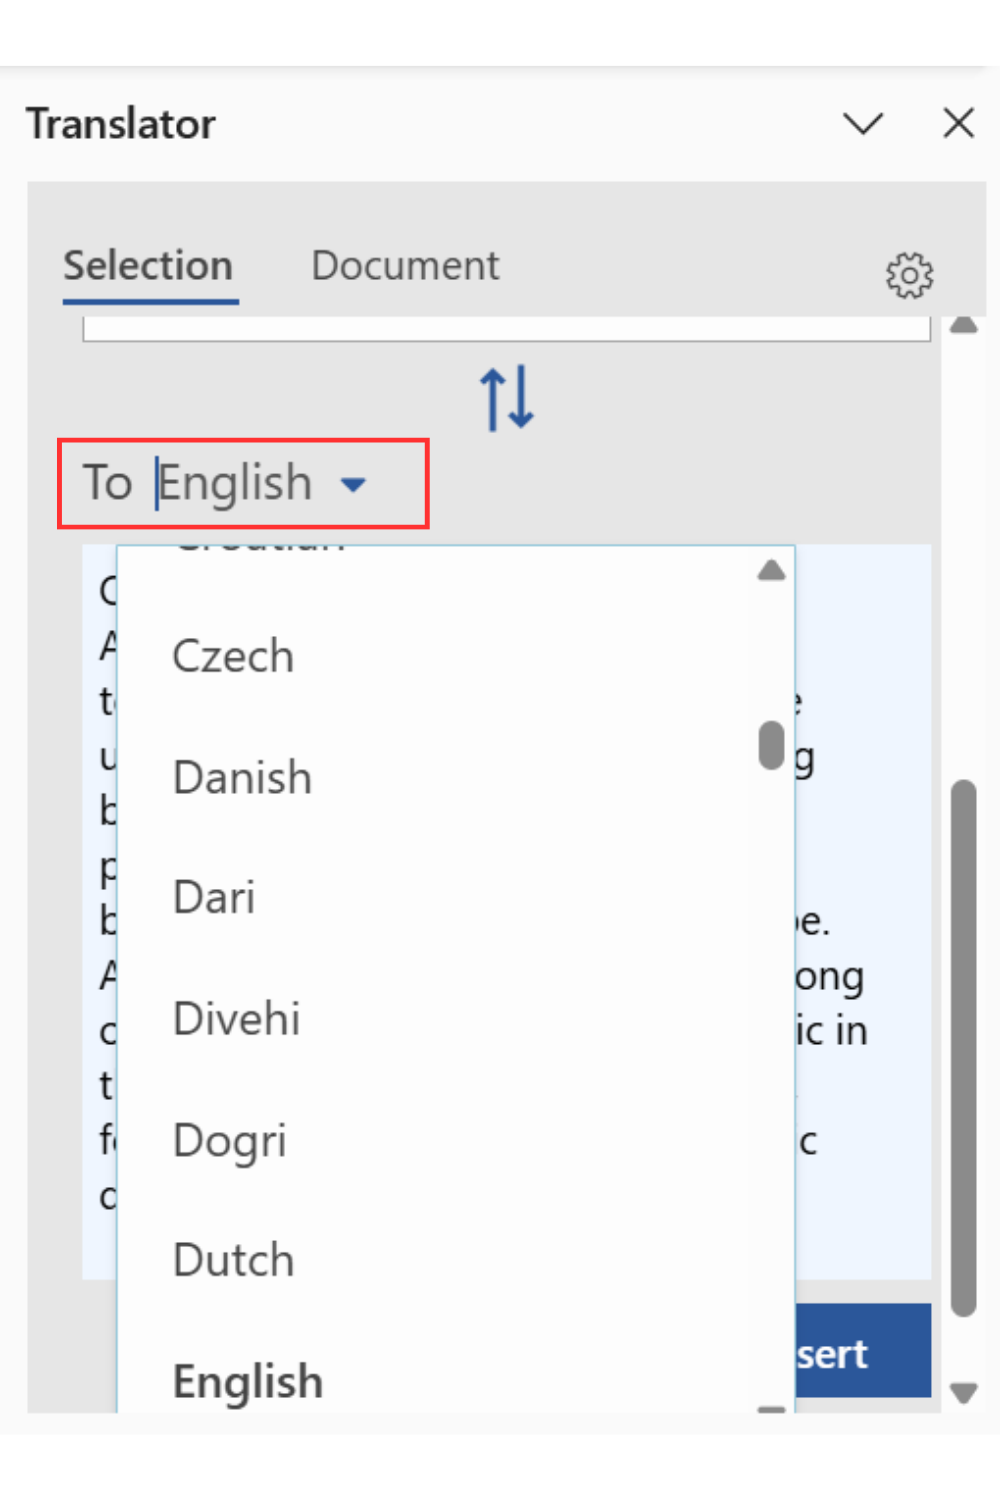
Step 4: Choose the Target Language
In the lower Language drop-down menu, choose the target language. When the target language changes, the translation updates automatically in the Translator pane.
Step 5: Insert or Copy the Translation
To replace the selected text with the translation, select Insert.
This is the step many users miss. If Insert is not selected, the translation is displayed in the pane, but the Word document does not change.
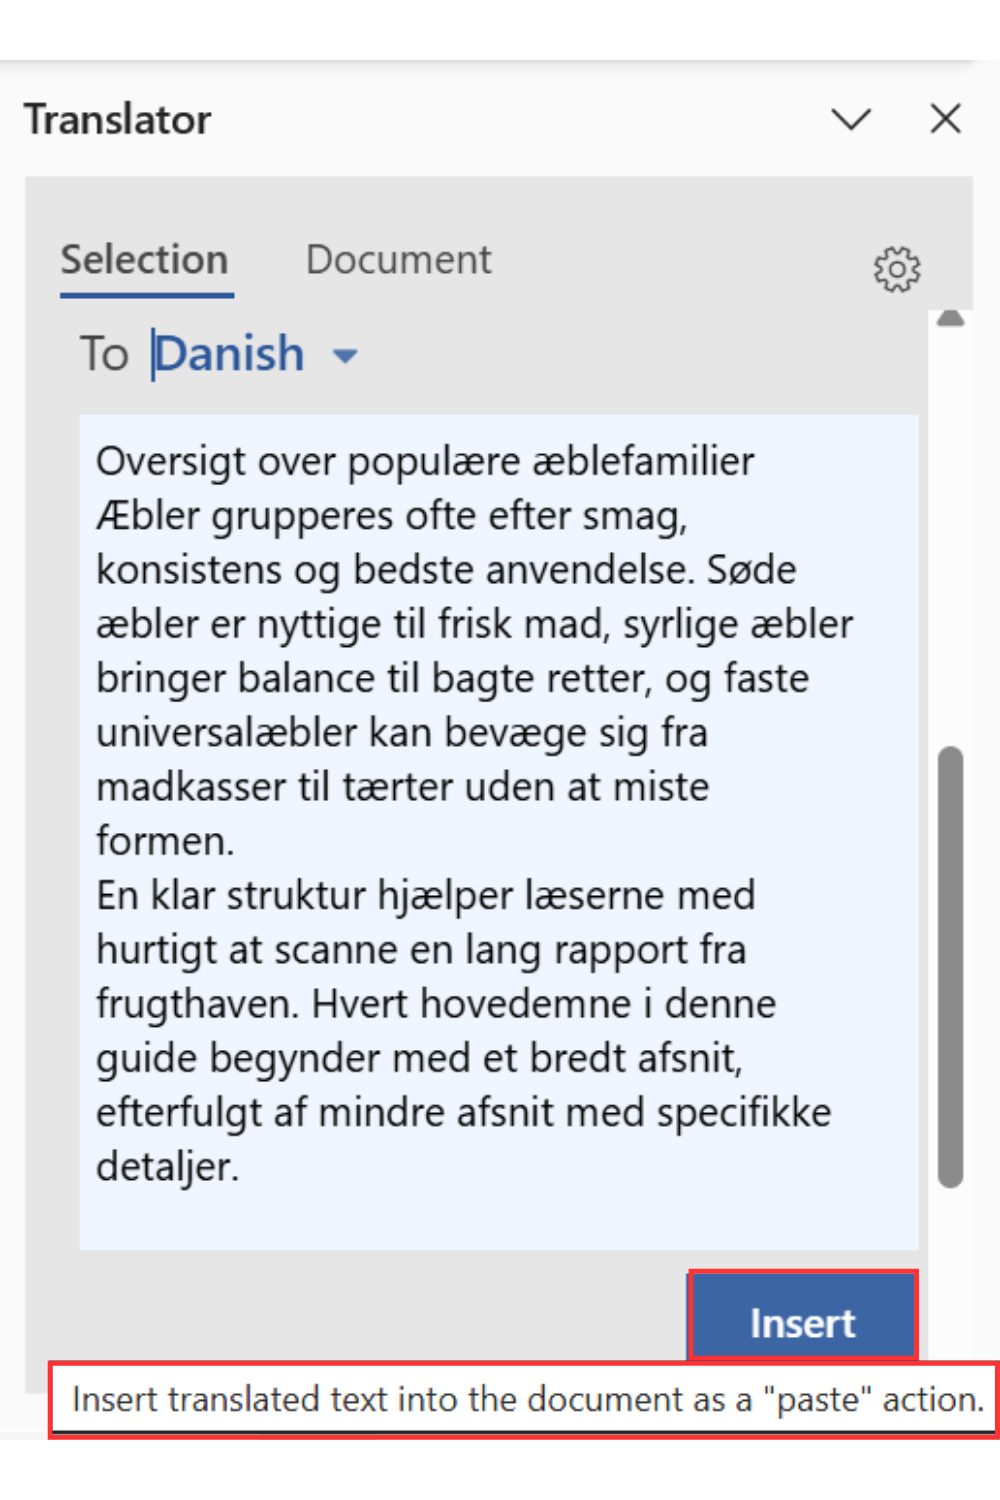
To keep the original text and add the translation below it, do not use Insert as a replacement. Instead, select the translated text in the Translator pane, press Ctrl + C, click where the translation should be placed in the document, and paste it with Ctrl + V or a paste option from the right-click menu.
How to Translate a Whole Document in Word
Section titled “How to Translate a Whole Document in Word”The full-document translation option is useful when the entire document needs to be translated. Unlike selected text translation, this method creates a new translated document and leaves the original file untouched.
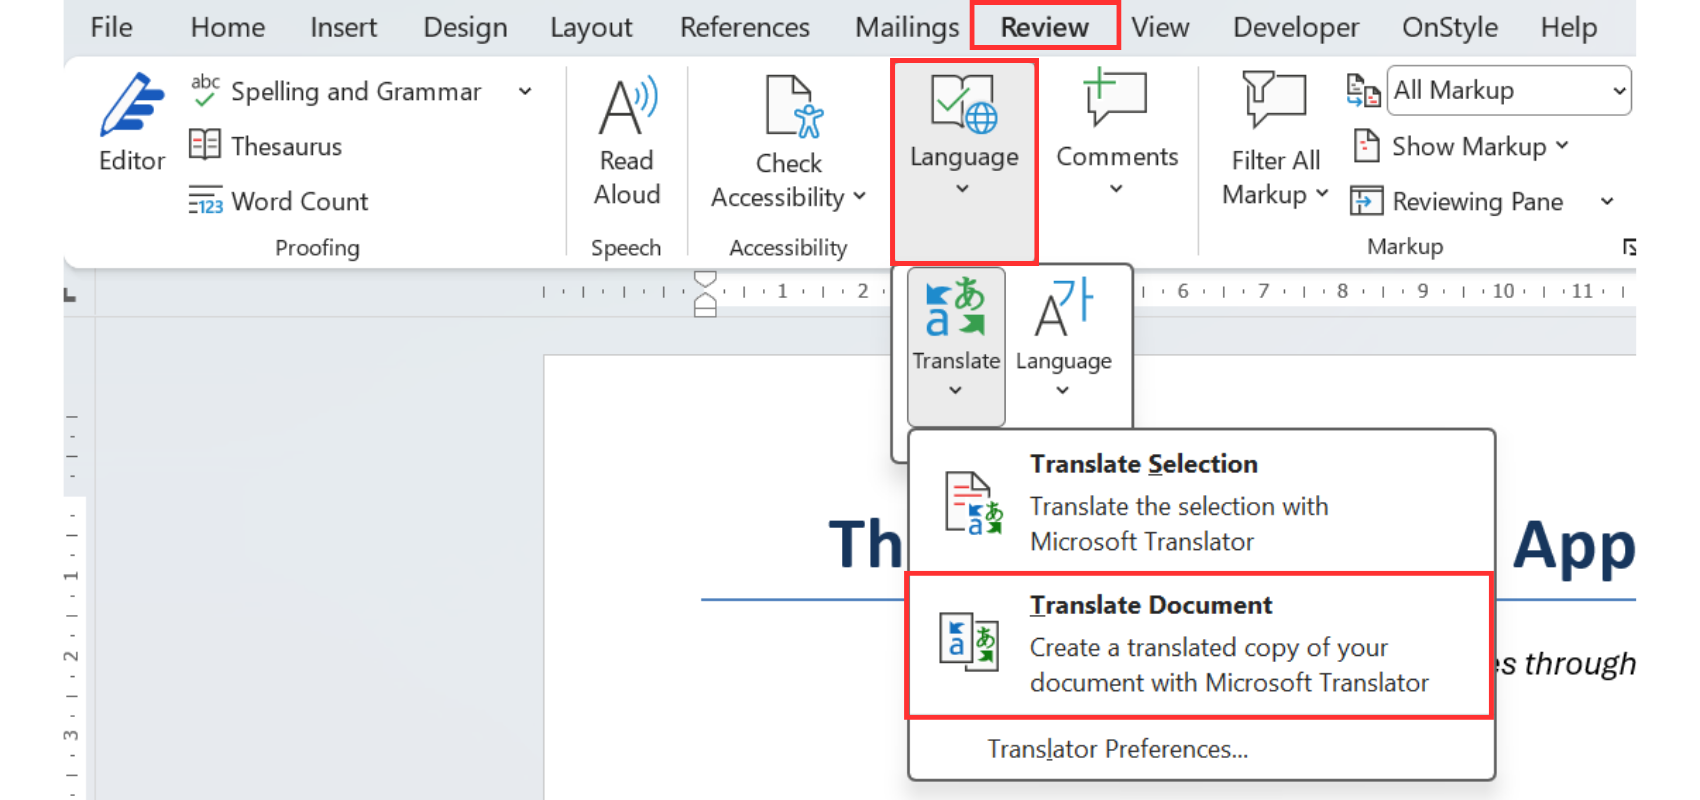
Step 1: Open Translate Document
- On the Review tab of the Ribbon, select Translate.
- Select Translate Document.
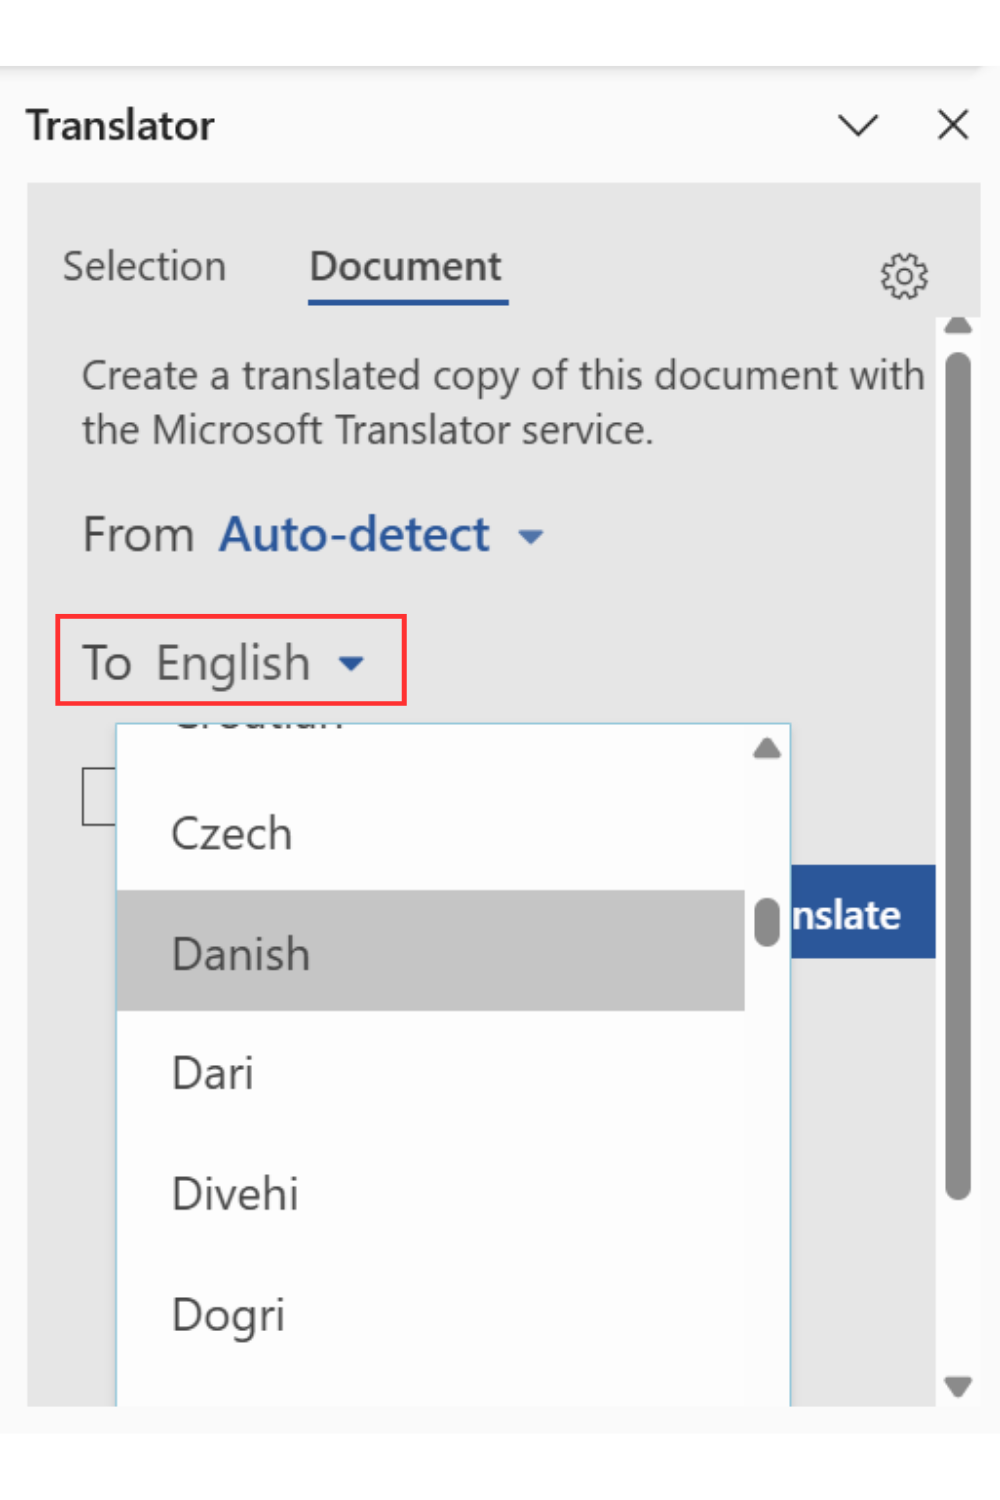
Step 2: Choose the Original Language
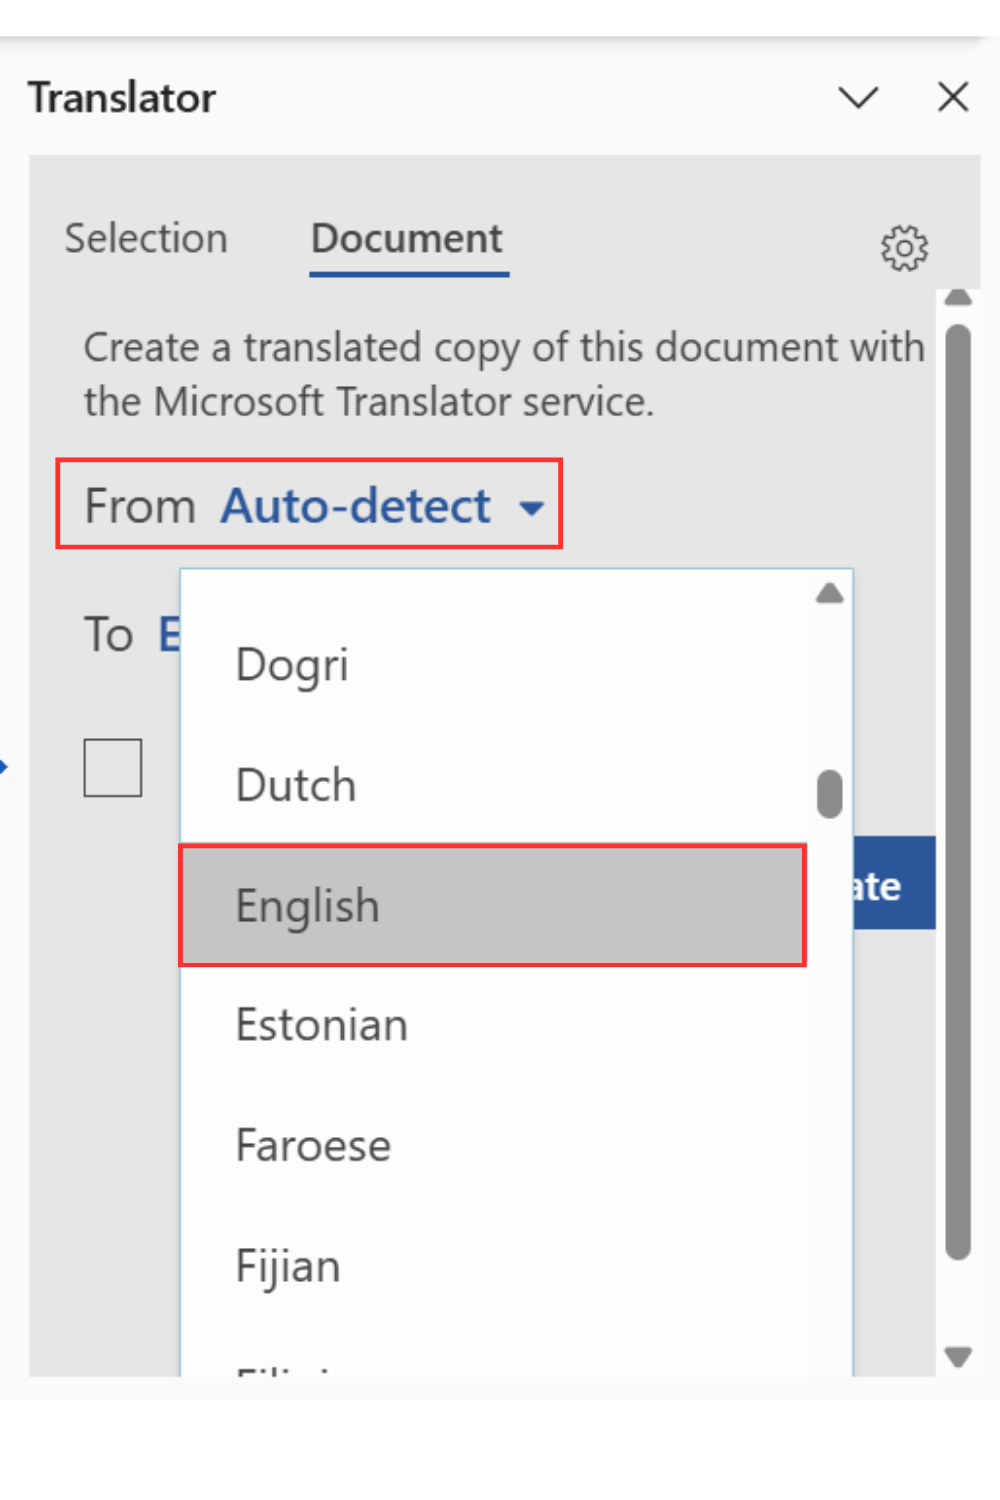
In the From language drop-down menu, select the document’s original language. Word can auto-detect the language, but choosing it manually can prevent mistakes when the document contains mixed language content or specialized terms.
Step 3: Choose the Target Language
In the To language drop-down menu, choose the language for the translated document.
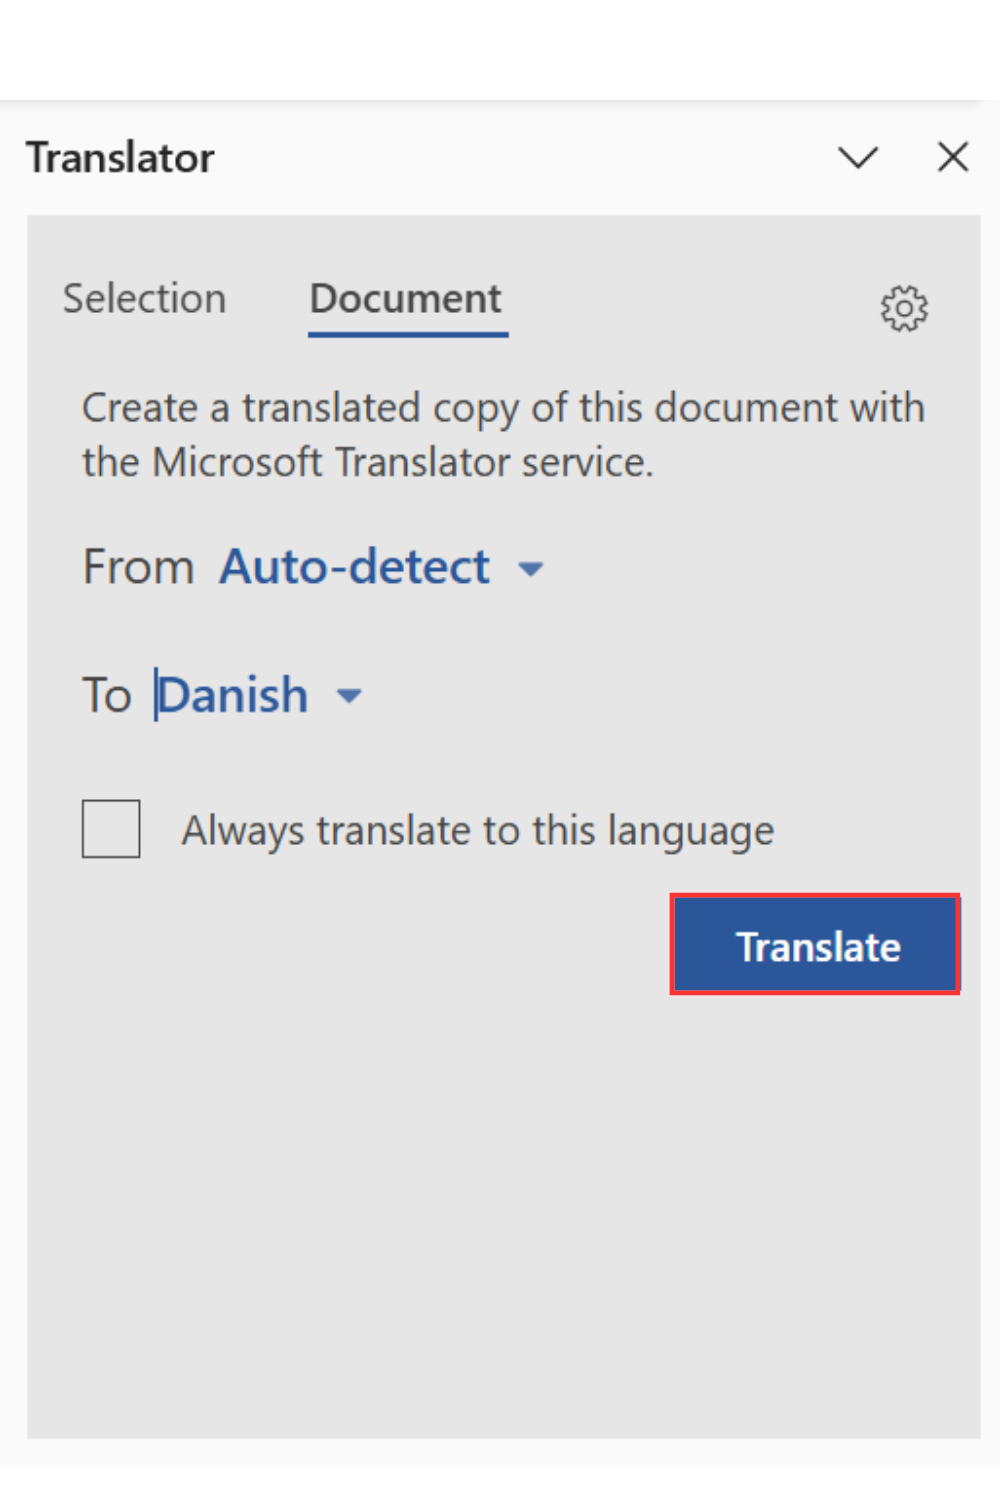
Step 4: Translate the Document
Select Translate.
Word creates a brand-new document with the translated content. The original document remains unchanged, which is useful because the source file is preserved and can always be compared with the translated version.
Step 5: Save the Translated File
Save the new translated document with a clear file name so it is easy to tell the original and translated versions apart.
A clear naming pattern can include the original file name and the target language, for example: Report_Translated_German.docx or Proposal_FR.docx.
How to Use Translator Preferences in Word
Section titled “How to Use Translator Preferences in Word”Translator Preferences controls whether Word should offer translation help for foreign language content and which languages should be excluded from those suggestions.
Step 1: Open Translator Preferences
- On the Review tab of the Ribbon, select Translate.
- Select Translator Preferences.
The preferences open in a pane on the right side of the Word window.
Step 2: Review Translation Suggestions
Use the available settings to control whether Word should offer to translate foreign language content. Language exclusions can also be set for this behavior.
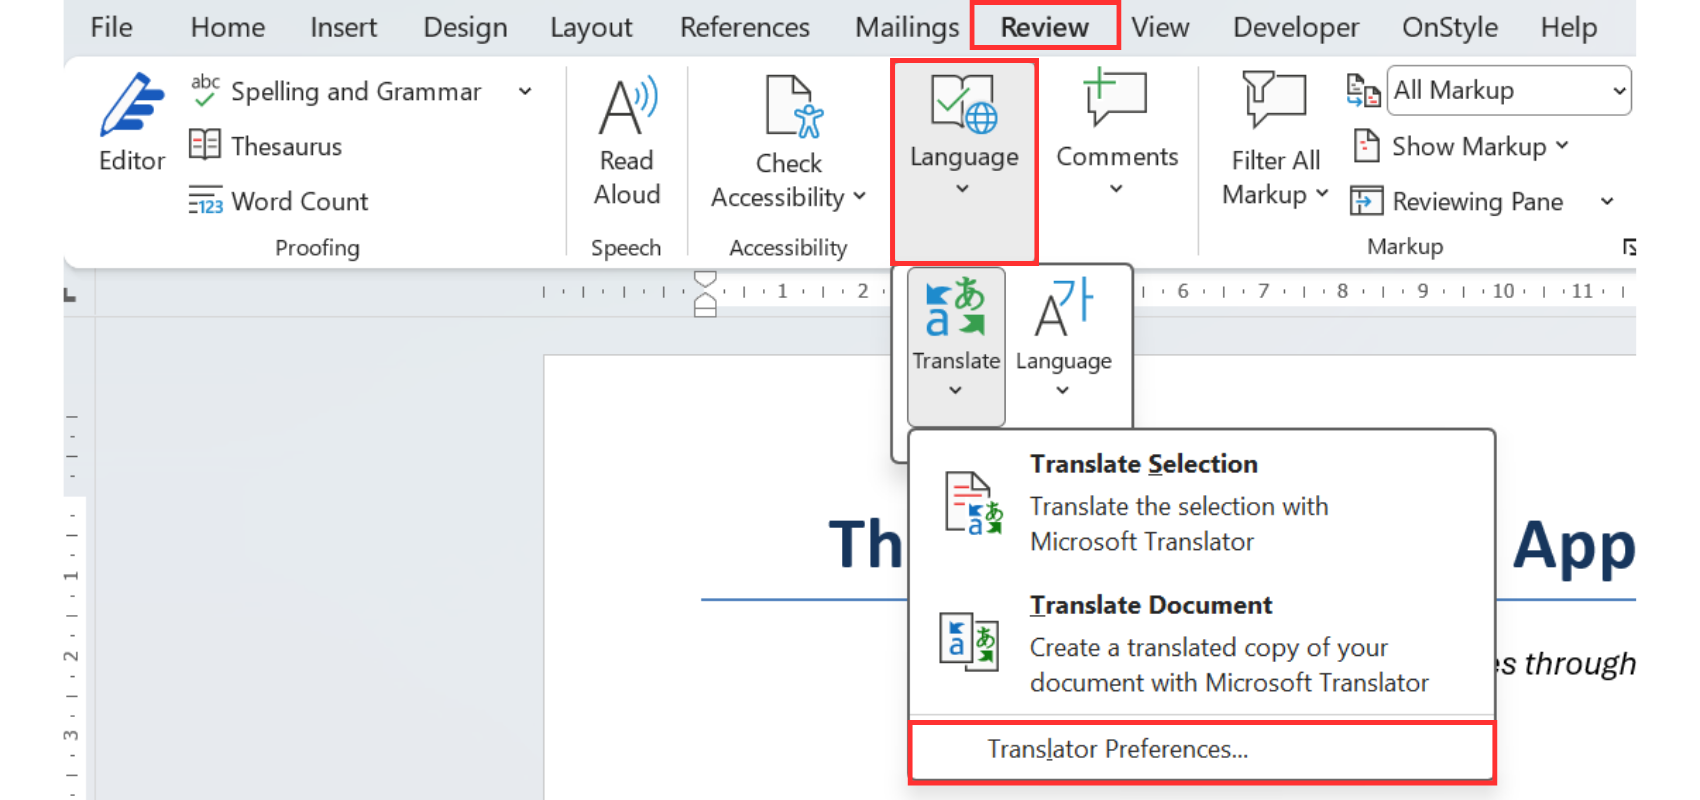
There are not many settings in this area, but the preferences can help reduce unwanted translation prompts in documents that intentionally contain multiple languages.
Common Problems with Translation in Word
Section titled “Common Problems with Translation in Word”Translation in Microsoft Word is straightforward, but several common issues can confuse users.
Translate Button Is Greyed Out
Section titled “Translate Button Is Greyed Out”If the Translate button is greyed out, the document may be protected, restricted, or read-only. Close protection first, or copy the text into a new Word document before using translation.
Inserted Translation Does Not Appear in the Document
Section titled “Inserted Translation Does Not Appear in the Document”If the translation appears in the Translator pane but nothing changes in the document, check whether text was selected before using Insert. Insert replaces selected text. Without selected text, the translation may not be inserted into the document as expected.
Spell Check Flags the Translated Text
Section titled “Spell Check Flags the Translated Text”If Word starts flagging the translated text with spelling or grammar errors, the proofing language may not match the translated language. Translation changes the text, but it does not always set the proofing language correctly.
To set the proofing language, go to the Review tab of the Ribbon, select Language, then select Set Proofing Language. Choose the new language and select OK.
Keyboard Tip for Opening the Review Tab
Section titled “Keyboard Tip for Opening the Review Tab”A quick keyboard route is available for users who prefer shortcuts.
Press Alt, then R to jump to the Review tab using the keyboard. From there, open the Translate menu to access the translation tools.
Best Practices for Translating Text in Microsoft Word
Section titled “Best Practices for Translating Text in Microsoft Word”When learning how to use the translation features of Microsoft Word, it is important to treat machine translation as a draft that should be reviewed before final delivery.
- Translate selected text when only a sentence, paragraph, or small section needs to change.
- Use Translate Document when the entire file needs a translated copy.
- Choose the source language manually when auto-detect may be unreliable.
- Use Insertonly when selected text should be replaced.
- Copy and paste the translated text when the original text should stay in the document.
- Save translated documents with clear language-specific file names.
- Set the proofing language after translation so spell check works correctly.
- Review translated text for accuracy, tone, terminology, and formatting before sharing.
Translation vs. Proofing Language in Word
Section titled “Translation vs. Proofing Language in Word”Translation and proofing language are related, but they are not the same feature.
Translation converts text from one language into another language. Proofing language controls the dictionary and grammar rules Word uses to check the text.
For example, translating an English paragraph into French changes the words. Setting the proofing language to French tells Word to check the translated paragraph with French spelling and grammar rules.
Important
If the translated text is correct but Word underlines it in red, change the proofing language to match the translated language.
Summary
Section titled “Summary”Learning how to use the translation features of Microsoft Word starts on the Review tab. Use Translate Selection for selected text, Translate Document for a full translated copy, and Translator Preferences to control translation suggestions.
Selected text translation can replace the original text with Insert, or the translation can be copied and pasted when both versions should remain in the document. Full-document translation creates a new file, so the original document stays unchanged.
After translating, check the result carefully and set the proofing language if spell check does not match the translated text. This creates a cleaner, more reliable translated Word document.