
How to Create a Cover Page in Word
Creating a professional cover page in Word is a key part of producing structured, high-quality documents. A well-designed cover page improves readability, establishes hierarchy, and provides a clear first impression for reports, proposals, academic papers, and regulatory documents. In many organizations, cover pages are part of document standards and must follow consistent formatting rules.
Microsoft Word provides two main approaches: built-in cover page templates and fully custom cover pages. While built-in templates allow quick setup, custom cover pages provide full control over layout, branding, and reusable document structures.
Common Cover Page Issues in Word Documents
Section titled “Common Cover Page Issues in Word Documents”Common issues include:
- Page numbers appearing on the cover page
- Custom cover pages not saved correctly
- Inconsistent spacing or alignment
- Incorrect header and footer behavior
- Missing or incomplete placeholder content
How to Insert a Built-In Cover Page in Word
Section titled “How to Insert a Built-In Cover Page in Word”The fastest way to create a cover page is by using Microsoft Word’s built-in cover page gallery. These templates are designed for common use cases and provide structured layouts that can be customized.
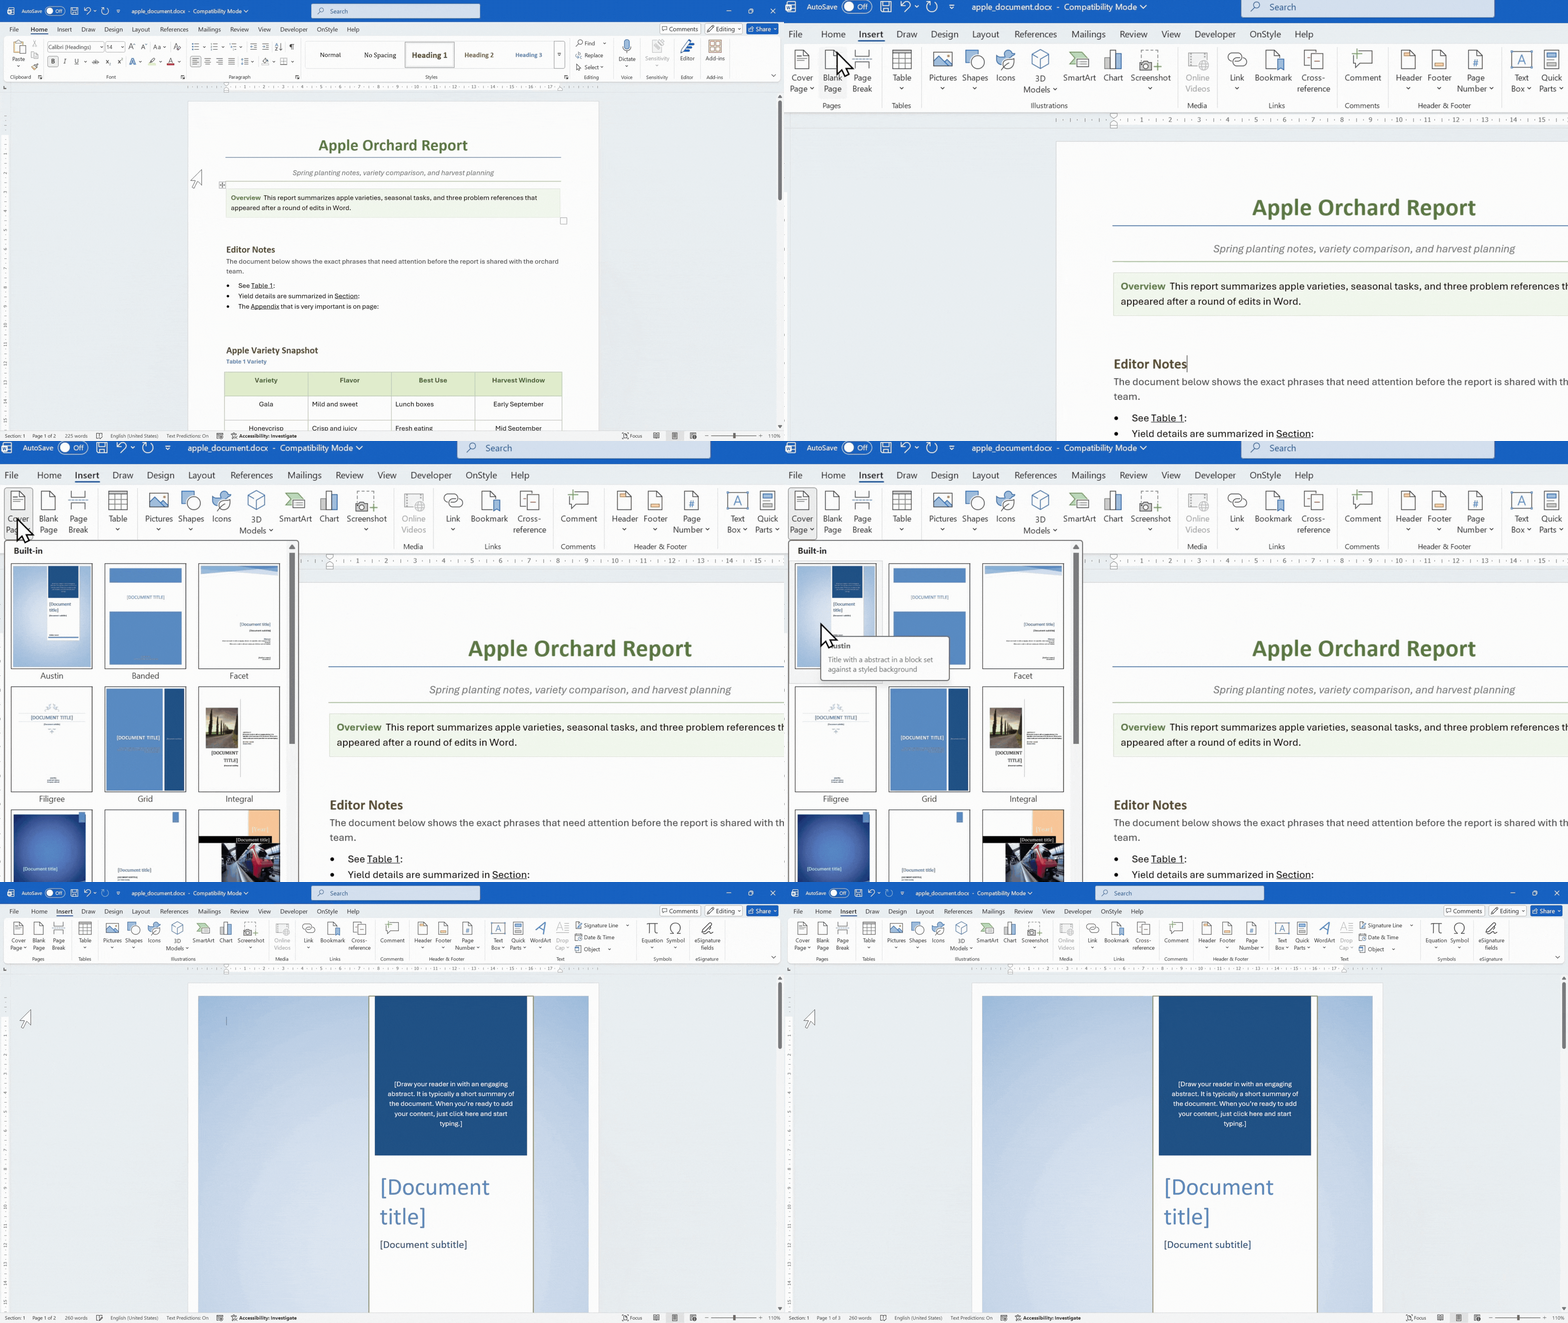
Step 1: Open the Cover Page Gallery
Section titled “Step 1: Open the Cover Page Gallery”On the Insert tab of the Ribbon, in the Pages group, select Cover Page. The built-in gallery appears with multiple predefined designs.
Step 2: Select and Insert a Template
Section titled “Step 2: Select and Insert a Template”Choose a cover page design that fits the document type. The cover page is automatically inserted at the beginning of the document.
Step 3: Insert a Cover Page in a Different Location (Optional)
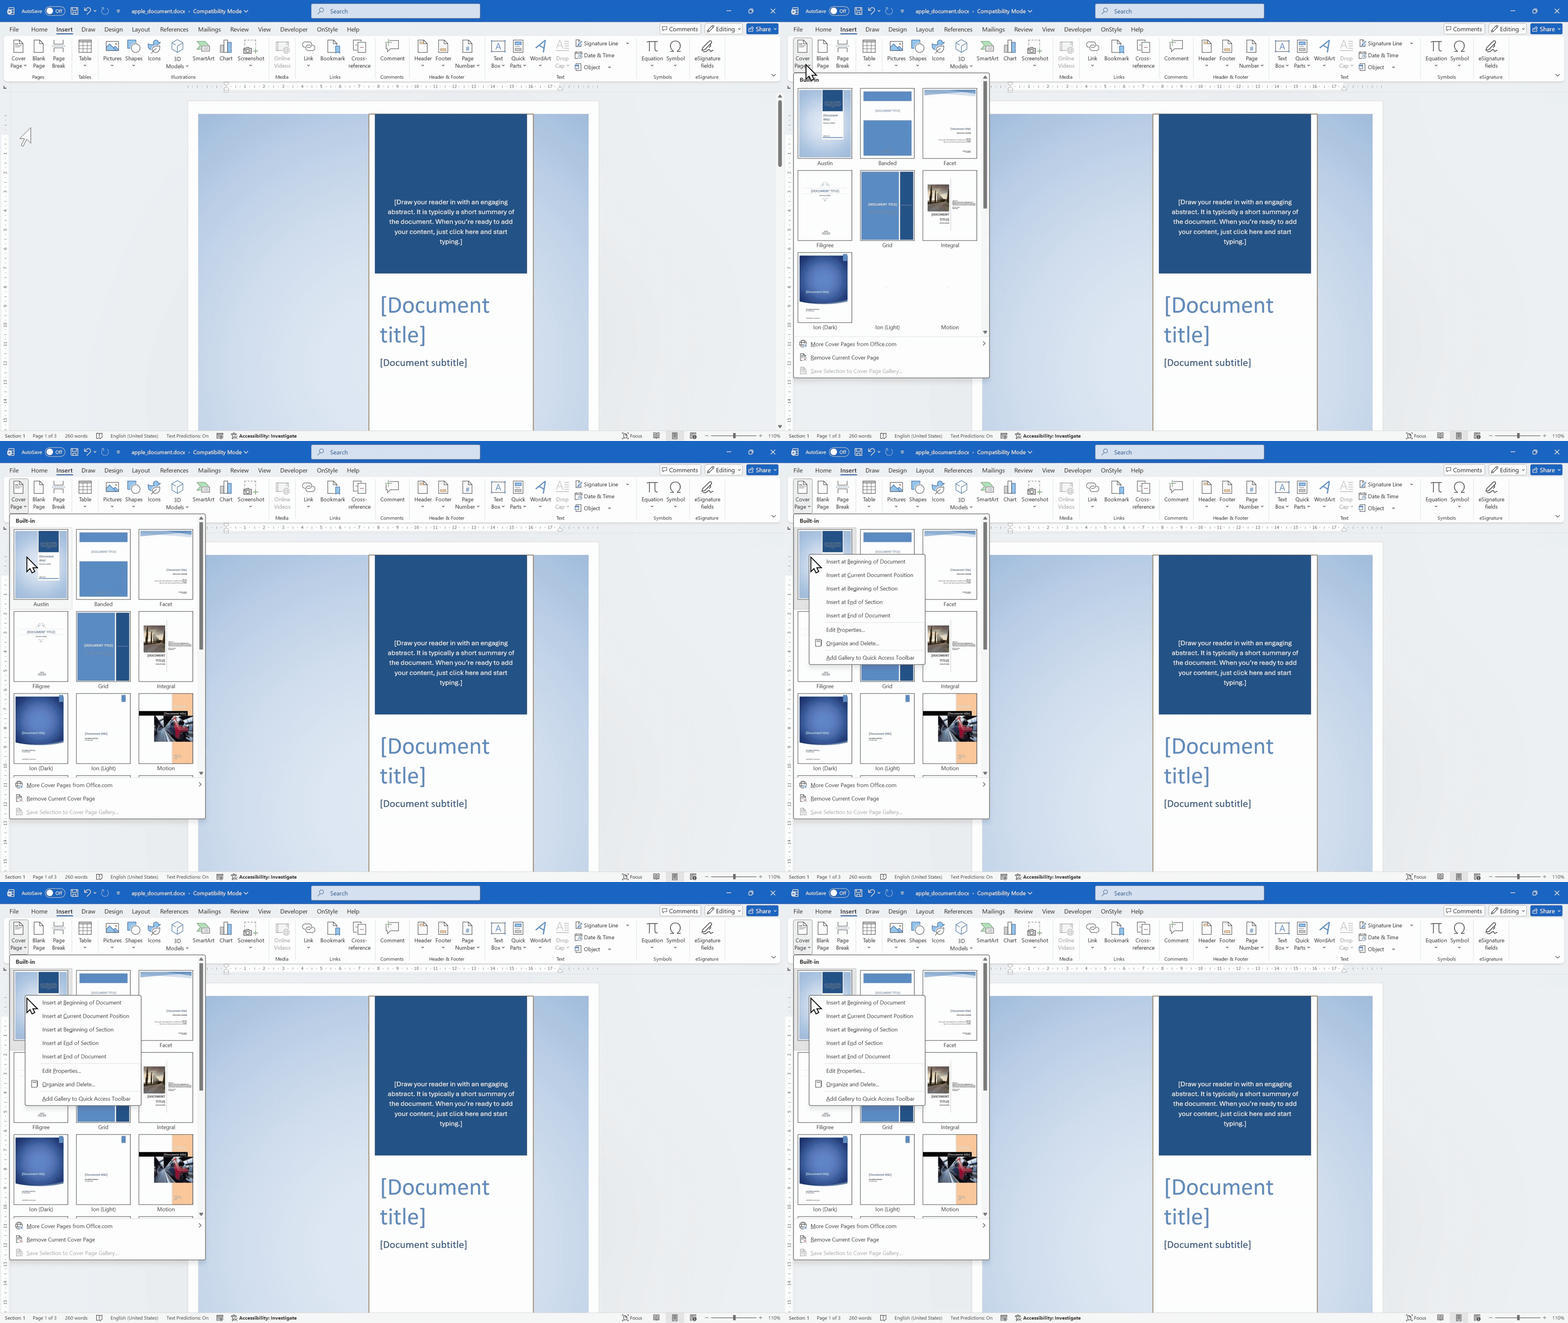
Section titled “Step 3: Insert a Cover Page in a Different Location (Optional)”- On the Insert tab of the Ribbon, select Cover Page.
- Right-click a cover page design in the gallery.
- Select the desired insertion location (for example, insert at the current position).
Step 4: Customize the Template
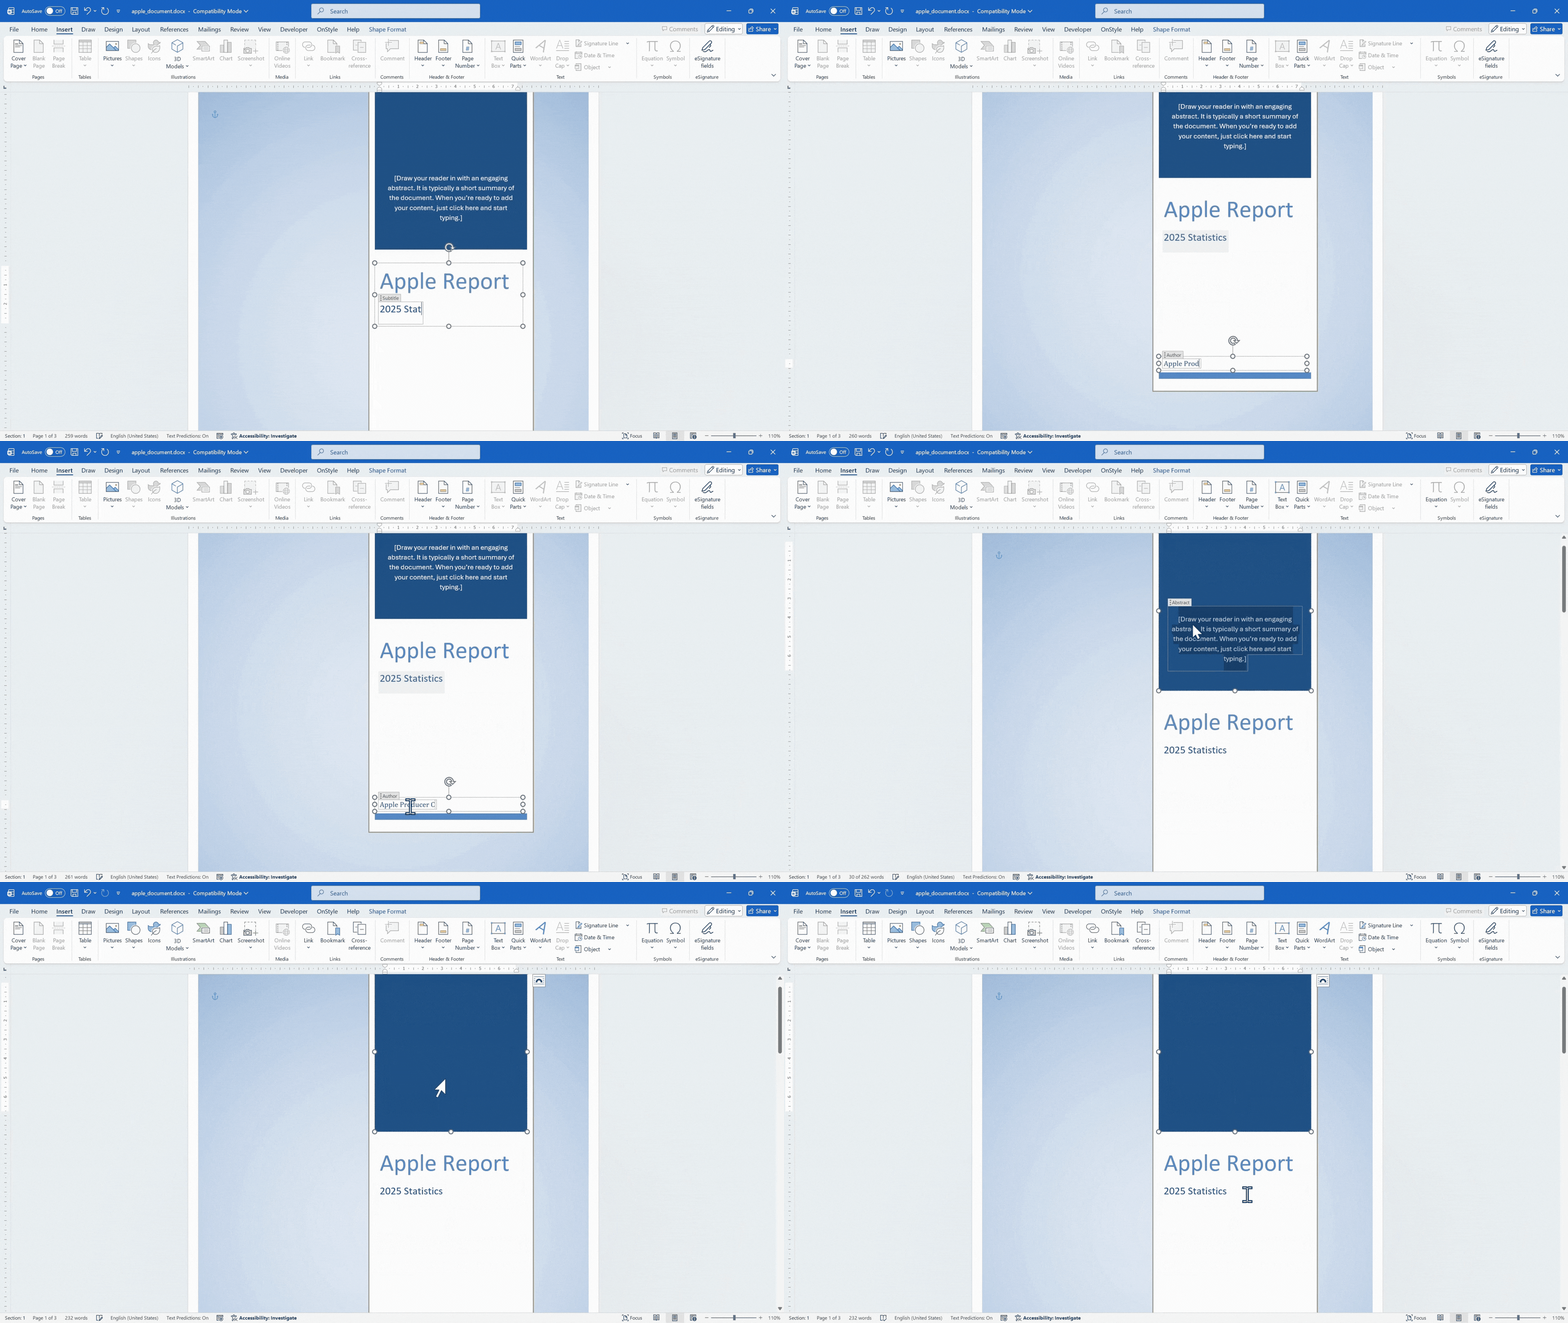
Section titled “Step 4: Customize the Template”Replace placeholder content such as title, subtitle, author name, company name, and date. Ensure that all fields are updated and that unnecessary elements are removed to maintain a clean layout.
Step 5: Adjust Layout and Formatting
Section titled “Step 5: Adjust Layout and Formatting”Modify font sizes, alignment, spacing, and positioning if required. Built-in templates can be customized like any other content in Word.
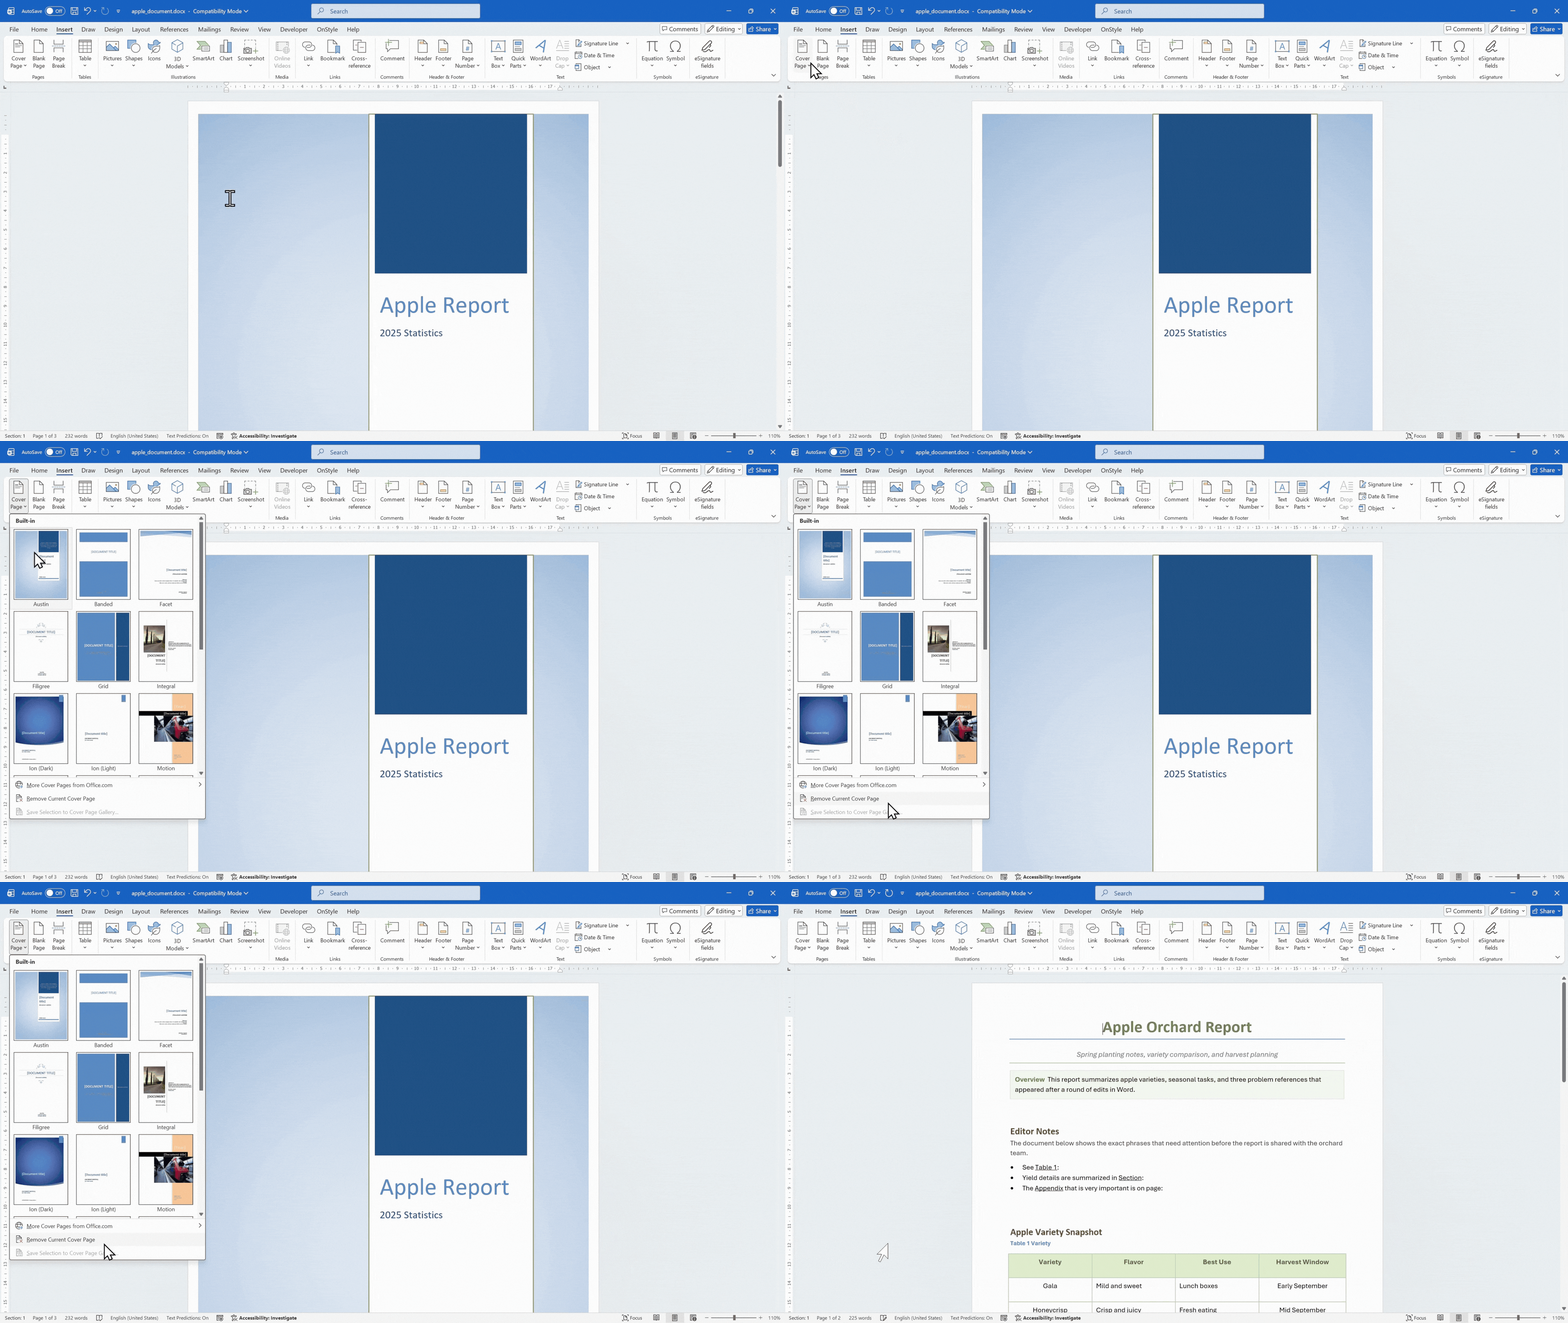
Step 6: Remove the Cover Page
Section titled “Step 6: Remove the Cover Page”On the Insert tab, select Cover Page, then select Remove Current Cover Page.
How to Create a Custom Cover Page in Word
Section titled “How to Create a Custom Cover Page in Word”Custom cover pages are required when documents must follow branding guidelines or when built-in templates do not meet layout requirements. Custom designs allow full control over structure and can be reused across multiple documents.
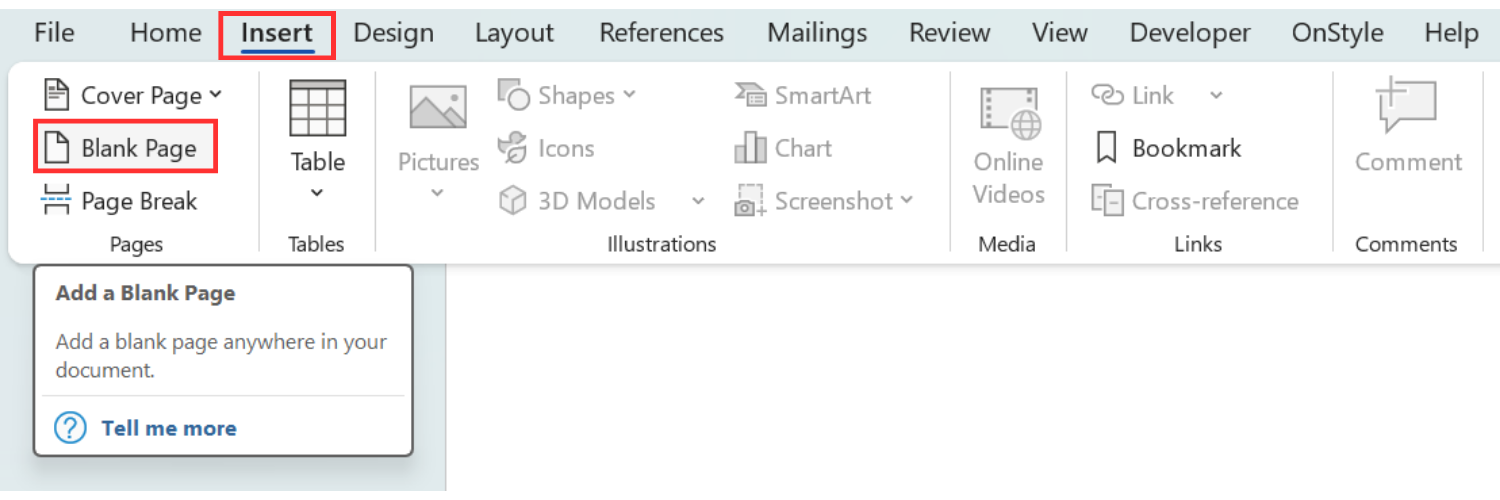
Step 1: Insert a Blank Page
Section titled “Step 1: Insert a Blank Page”Place the cursor at the beginning of the document and insert a blank page using the Insert tab.
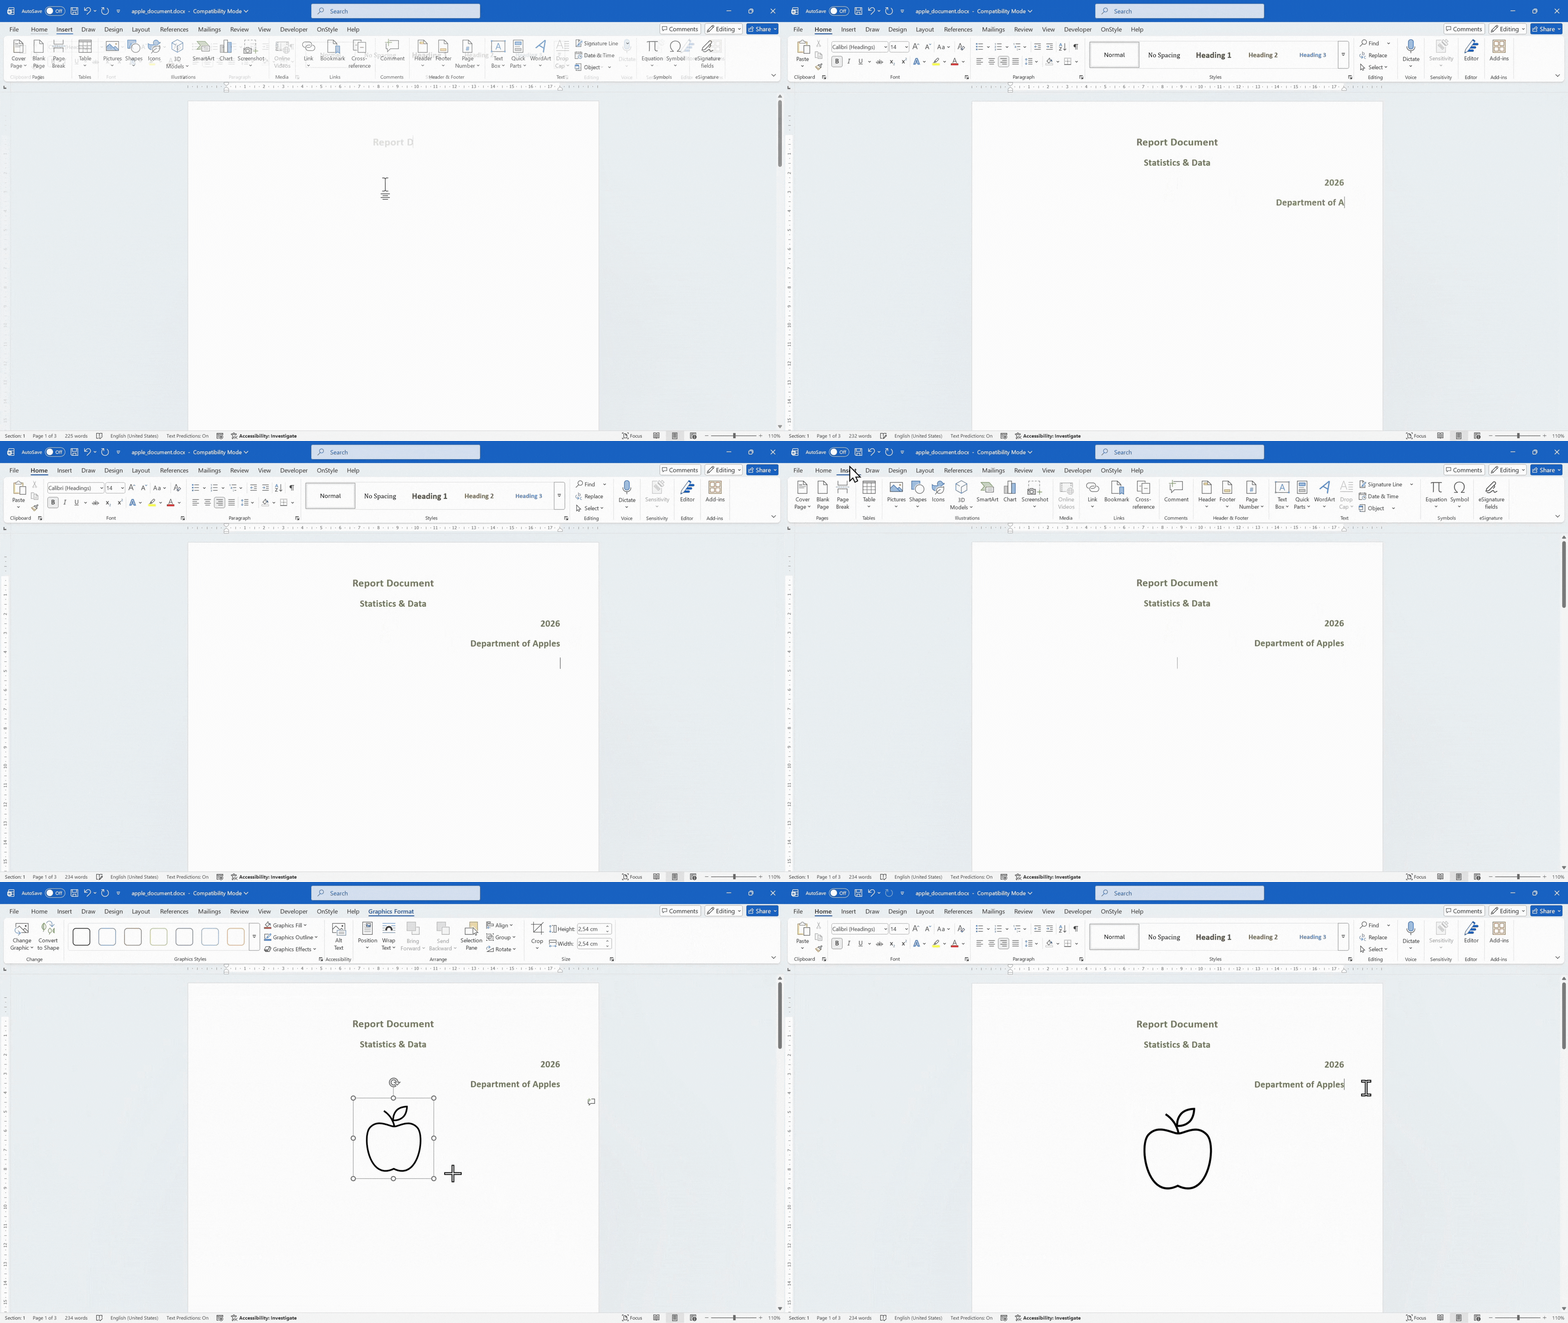
Step 2: Design the Cover Page Layout
Section titled “Step 2: Design the Cover Page Layout”Add key elements such as title, subtitle, author, department, and date. Apply consistent formatting using alignment tools, font styles, and spacing settings.
Optional design elements include logos, lines, shapes, and images. These elements improve visual structure but should be used consistently.
Ensure that the layout follows a logical structure. Titles should be prominent, supporting information should be clearly grouped, and spacing should be balanced.
Step 3: Save the Cover Page as a Template
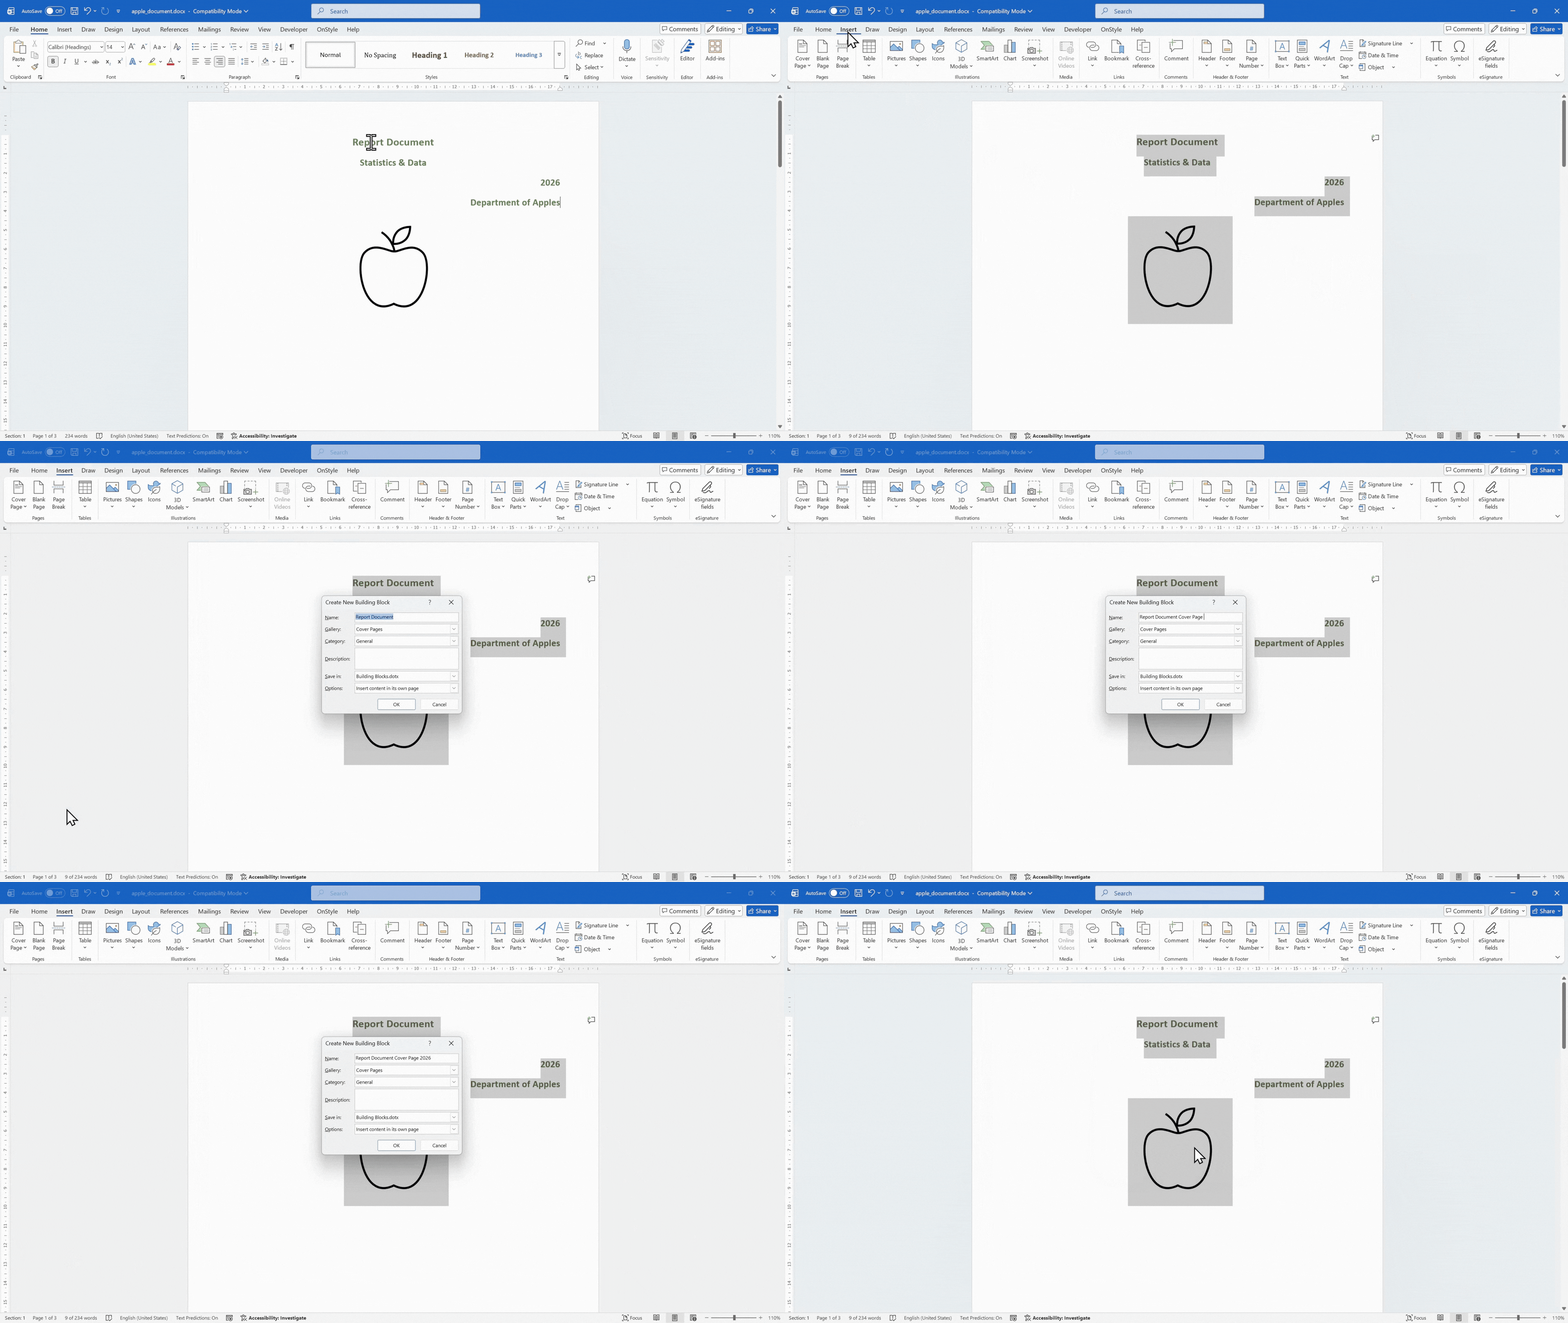
Section titled “Step 3: Save the Cover Page as a Template”Select all elements of the cover page. On the Insert tab, select Cover Page, then select Save Selection to Cover Page Gallery.
Enter a clear name and confirm. The cover page is stored in the Building Blocks file.
Step 6: Reuse the Custom Cover Page
Section titled “Step 6: Reuse the Custom Cover Page”Open another document, go to Insert, select Cover Page, and choose the saved template from the gallery.
How to Remove Page Numbers from the Cover Page
Section titled “How to Remove Page Numbers from the Cover Page”Page numbers are often applied globally and may appear on the cover page. This must be corrected separately.
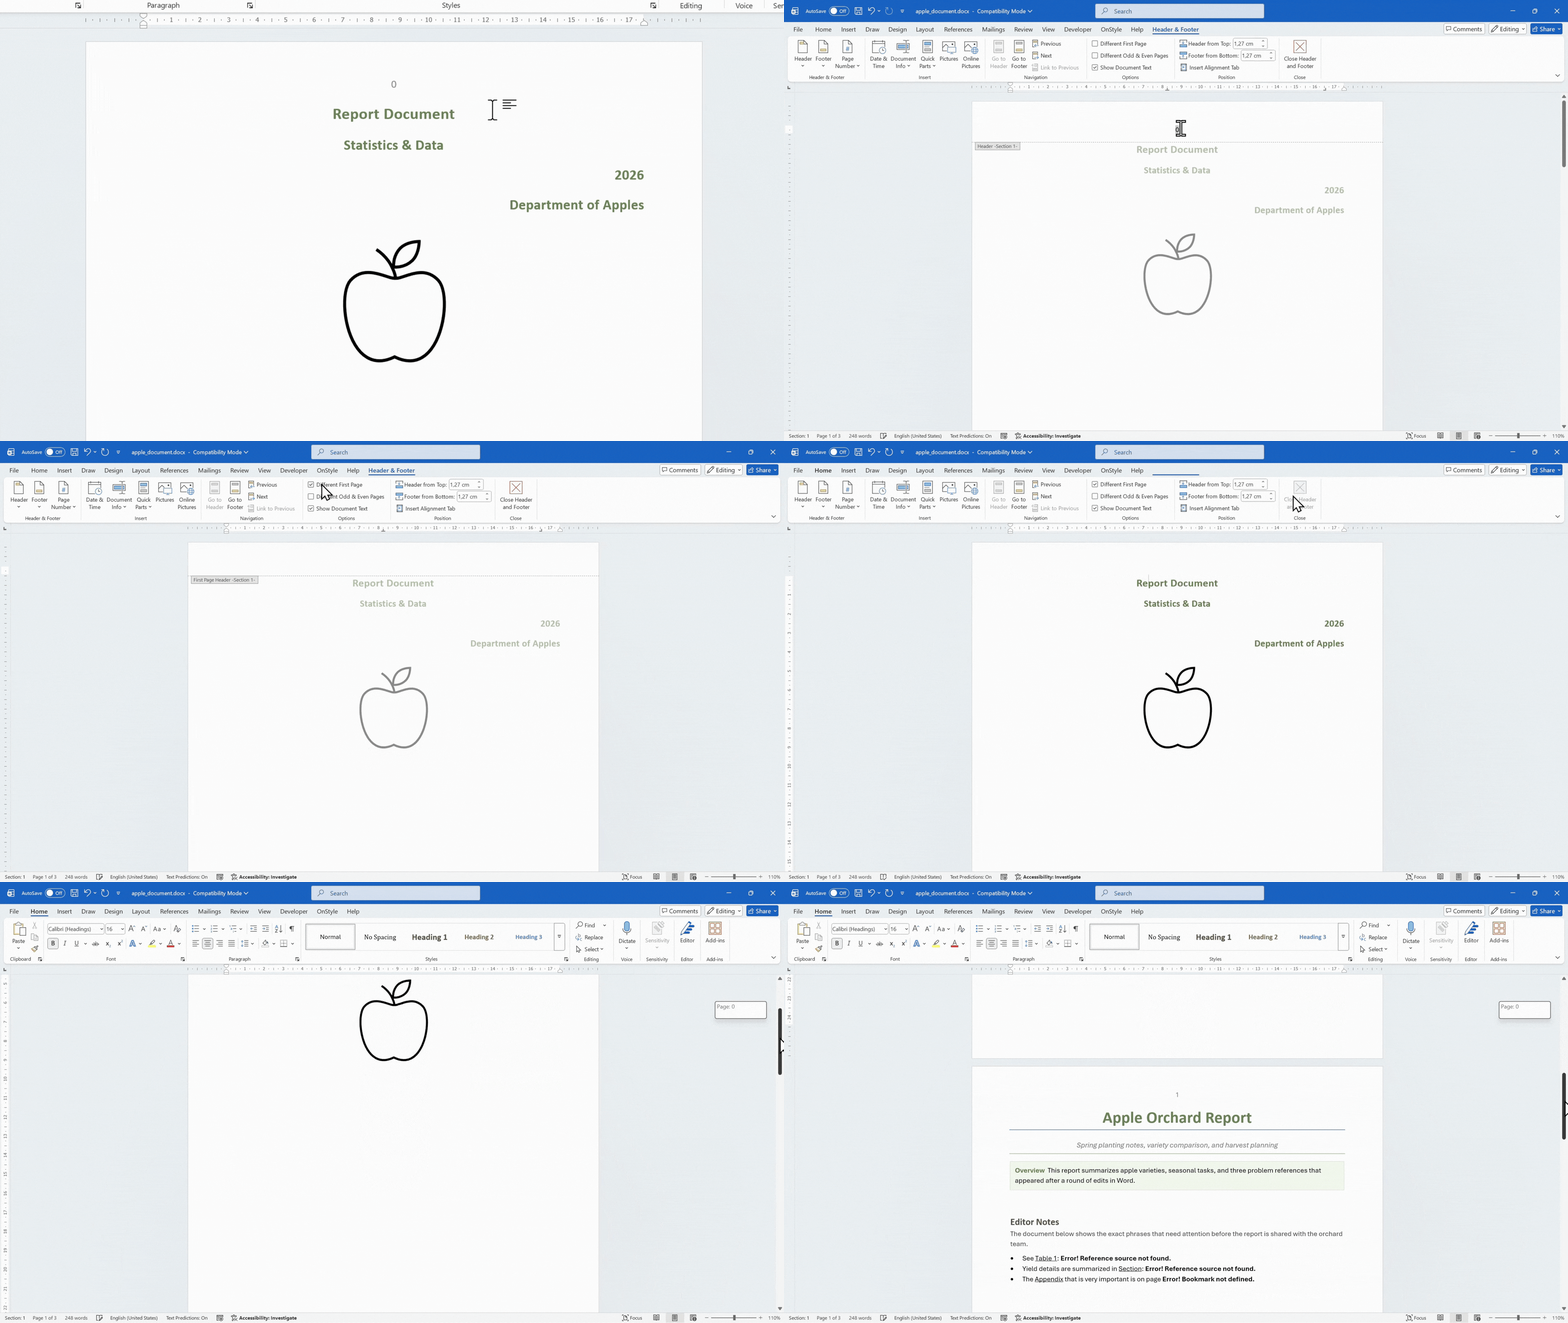
Step 1: Open Header or Footer
Section titled “Step 1: Open Header or Footer”Double-click in the header or footer area of the cover page.
Step 2: Enable Different First Page
Section titled “Step 2: Enable Different First Page”Enable the Different First Page option in the Header & Footer tools. This removes page numbers from the cover page.
Step 3: Verify Document Numbering
Section titled “Step 3: Verify Document Numbering”Scroll through the document to confirm that page numbers remain correct on subsequent pages.
Summary
Section titled “Summary”Microsoft Word provides both built-in and custom approaches for creating cover pages. Built-in templates offer speed and convenience, while custom cover pages provide flexibility and branding control. Proper setup of layout, page numbering, and reusable templates ensures consistent document structure.