
How to Insert a Full-Page Background Image in Word
Learning how to insert a full-page background image in Word is useful when you want to create flyers, invitations, event programs, certificates, cover pages, recipe pages, school handouts, or report covers. Word can place a picture behind text, but the method matters if the image needs to fill the whole page without blocking the document content.
This tutorial explains two practical ways to add a full-page background image in Word. The most reliable method is to place the picture in the header and set it behind the text. The faster method is to use a picture watermark. Both methods can work, but they give you different levels of control.
Why Use a Full-Page Background Image in Word?
Section titled “Why Use a Full-Page Background Image in Word?”A full-page background image can make a basic Word document look more polished and professional. It can be used for a visual cover page, a one-page flyer, a school handout, an event guide, an invitation, or a certificate. The goal is to make the picture fill the page while keeping the main text readable and editable.
The main challenge is layering. If the picture stays in front of the text, it covers the words. If the picture is inserted only in the body of the document, it can move around while you edit. Placing the image in the header gives the design more stability because header content can sit behind the main document text.
Method 1: Insert a Full-Page Background Image Using the Header
Section titled “Method 1: Insert a Full-Page Background Image Using the Header”The header method is usually the best way to insert a full page background image in Microsoft Word because it gives you more control over the image size, position, and text layering. It may sound unusual at first, but it works because the picture can sit inside the header while the document text remains in the main body.
Step 1: Open the document.
Start by opening the Word document where the full-page background image should appear.
Step 2: Open the header area.
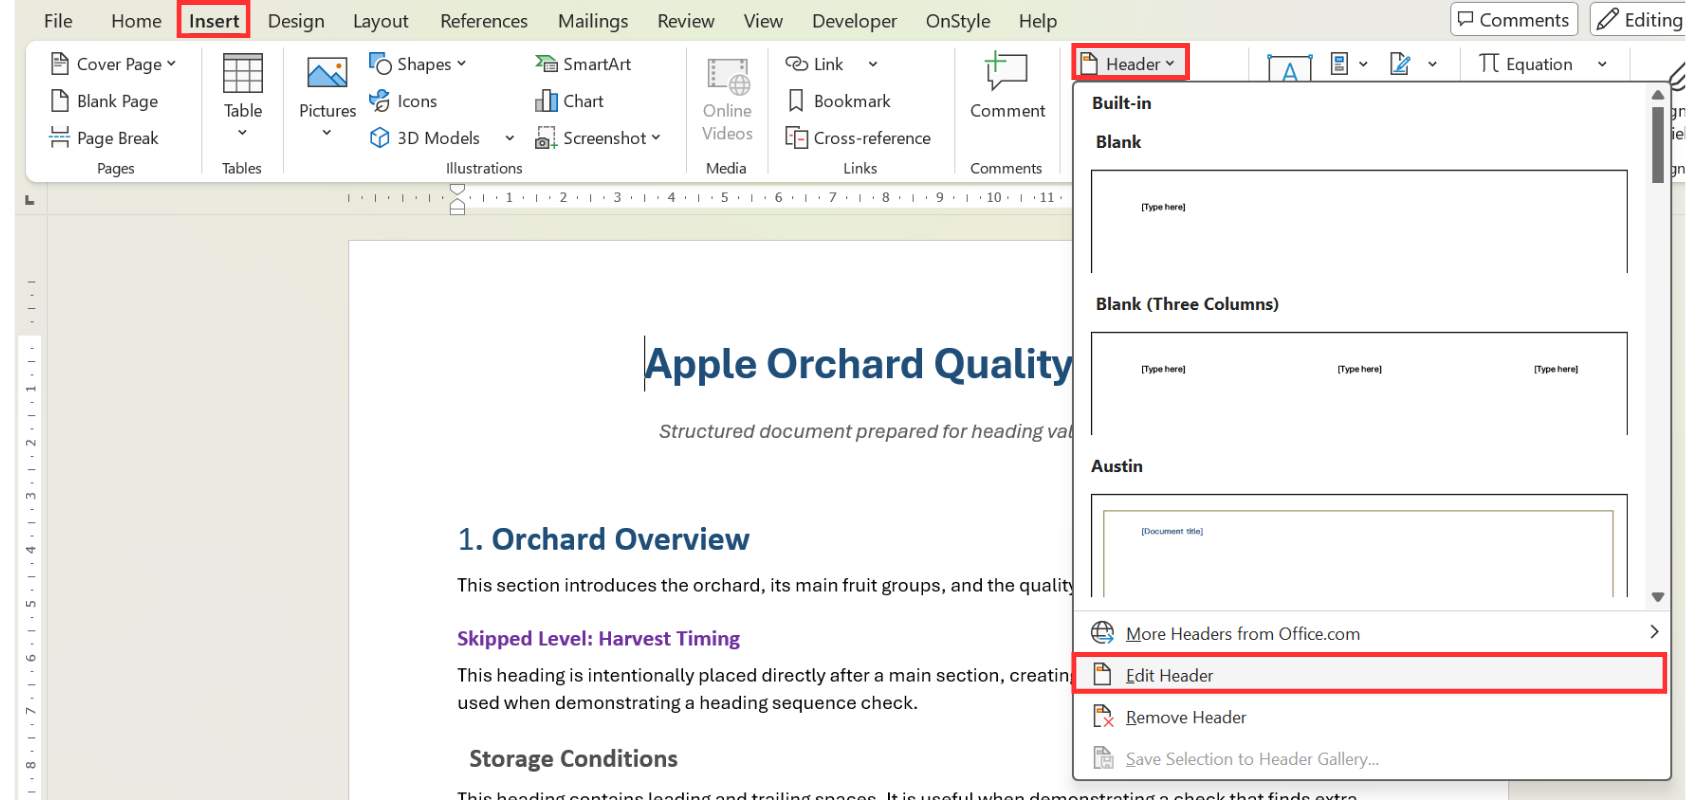
Go to the Insert tab, select Header, and choose Edit Header. Word now switches into the header area. The main document text becomes less active while you work with header content.
Step 3: Insert the picture.
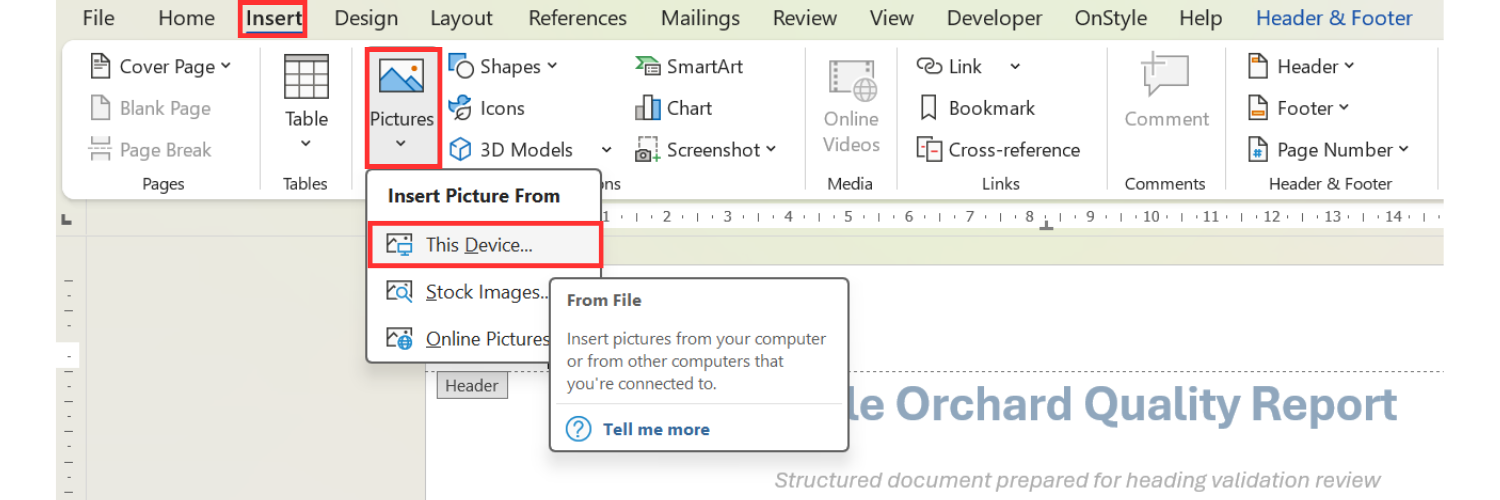
While the header is open, go to the Insert tab again, select Pictures, and choose choose the source of the picture, for example if the picture is on your computer, choose This Device. Select the image you want to use as the page background and insert it into the document.
Step 4: Place the picture behind the text.
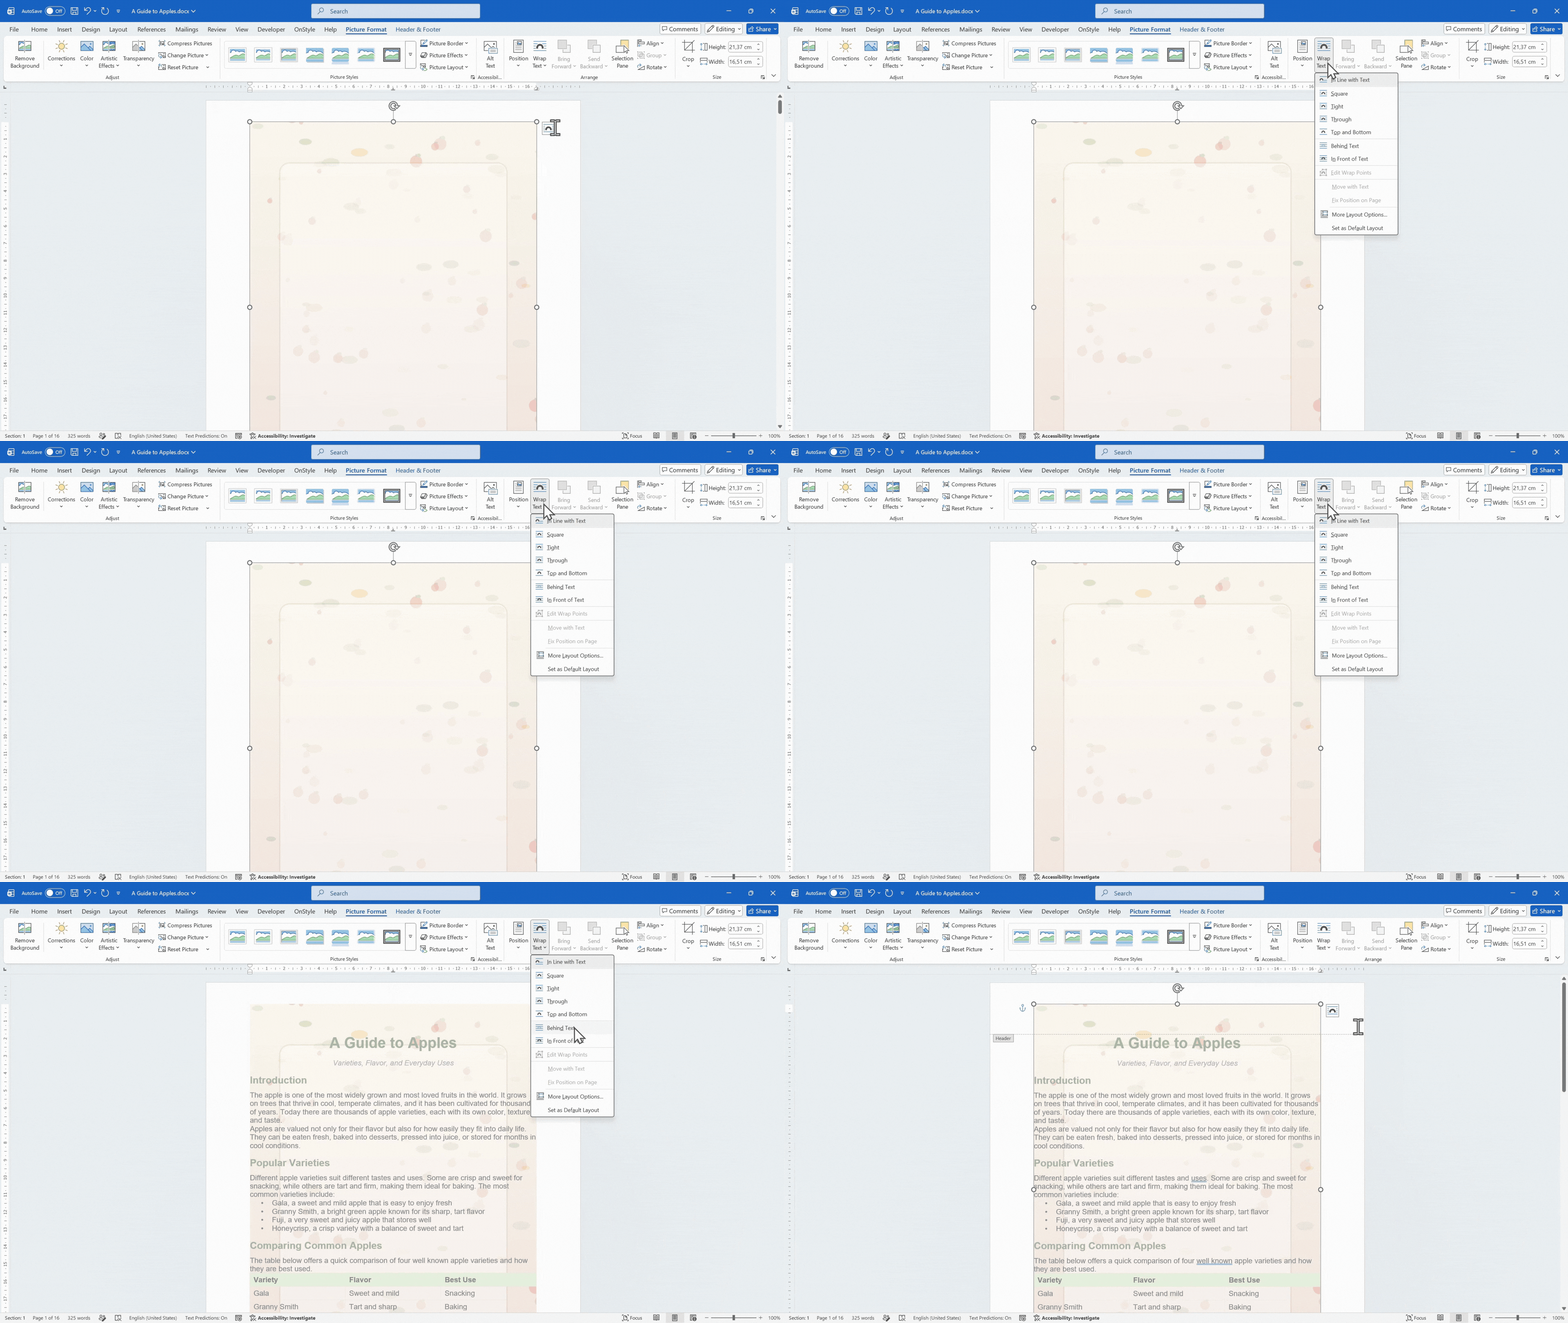
Select the image. Go to the Picture Format tab, select Wrap Text, and choose Behind Text. This is the key step because it allows the regular document text to appear in front of the image instead of being covered by it.
Step 5: Resize the image to cover the full page.
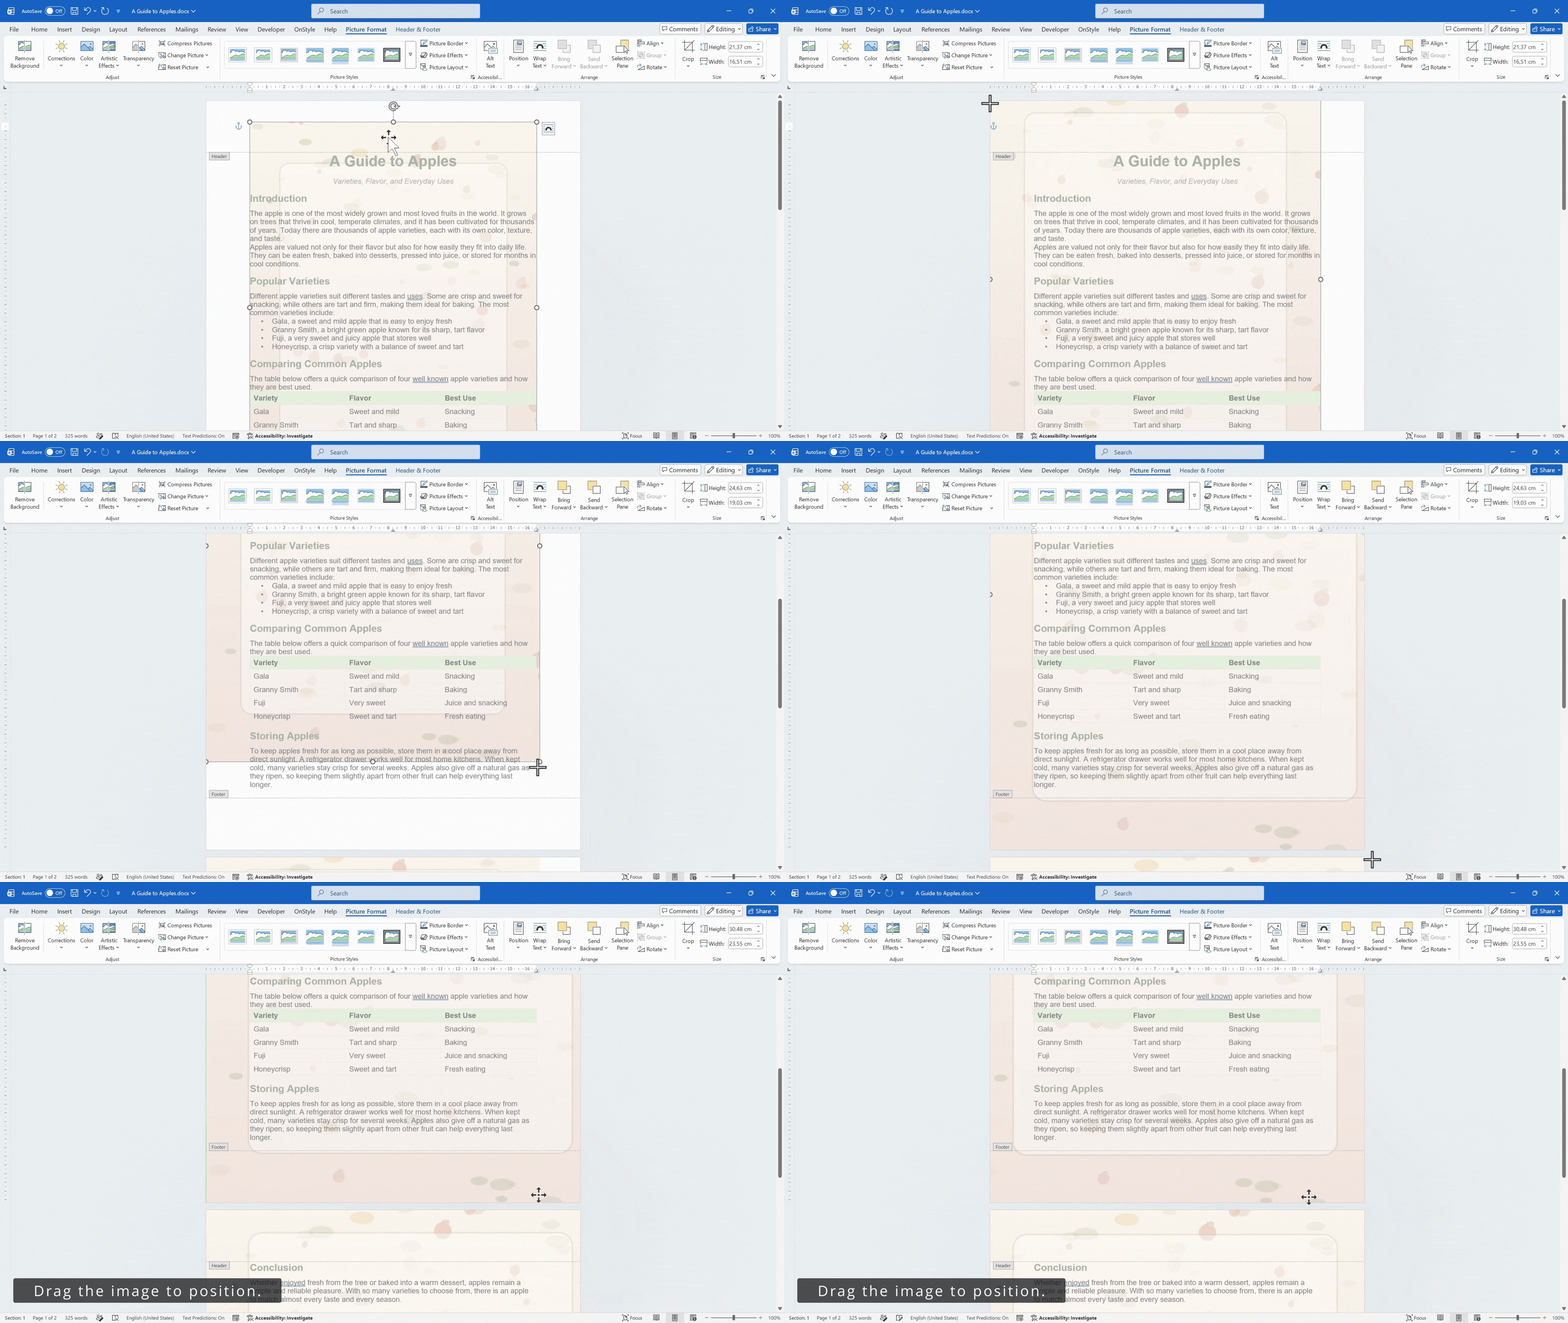
Drag the corner handles until the picture covers the entire page. Use the corner handles instead of the side handles so the image keeps its original proportions and does not become stretched.
Step 6: Match the image to the page size if needed.
For a standard US Letter page, the page size is usually 8.5 inches wide by 11 inches tall. For A4, the page size is usually 21 centimeters wide by 29.7 centimeters tall. If the image needs exact sizing, go to Picture Format, open the Size options, and set the height and width to match your page size.

Step 7: Position the image against the page edges.
Move the picture so it reaches all page edges. If the image does not match the page shape exactly, it is usually better to let the picture extend slightly beyond the page edges instead of leaving a white strip around the document.
Step 8: Close the header.
When the image is in place, go to the Header & Footer tab and select Close Header and Footer. You can now click back into the document body and edit the text normally.

How to Keep Text Readable Over a Background Image
Section titled “How to Keep Text Readable Over a Background Image”After you insert a full-page background image in Microsoft Word, check whether the text is still easy to read. A dark, detailed, or busy picture can make small text difficult to see.
To improve readability, double-click near the top of the page to reopen the header, then select the image. Use Picture Format to adjust Corrections, brightness, contrast, or Transparency if those options are available in your version of Word. A softer background usually looks more professional and keeps the document easier to read.
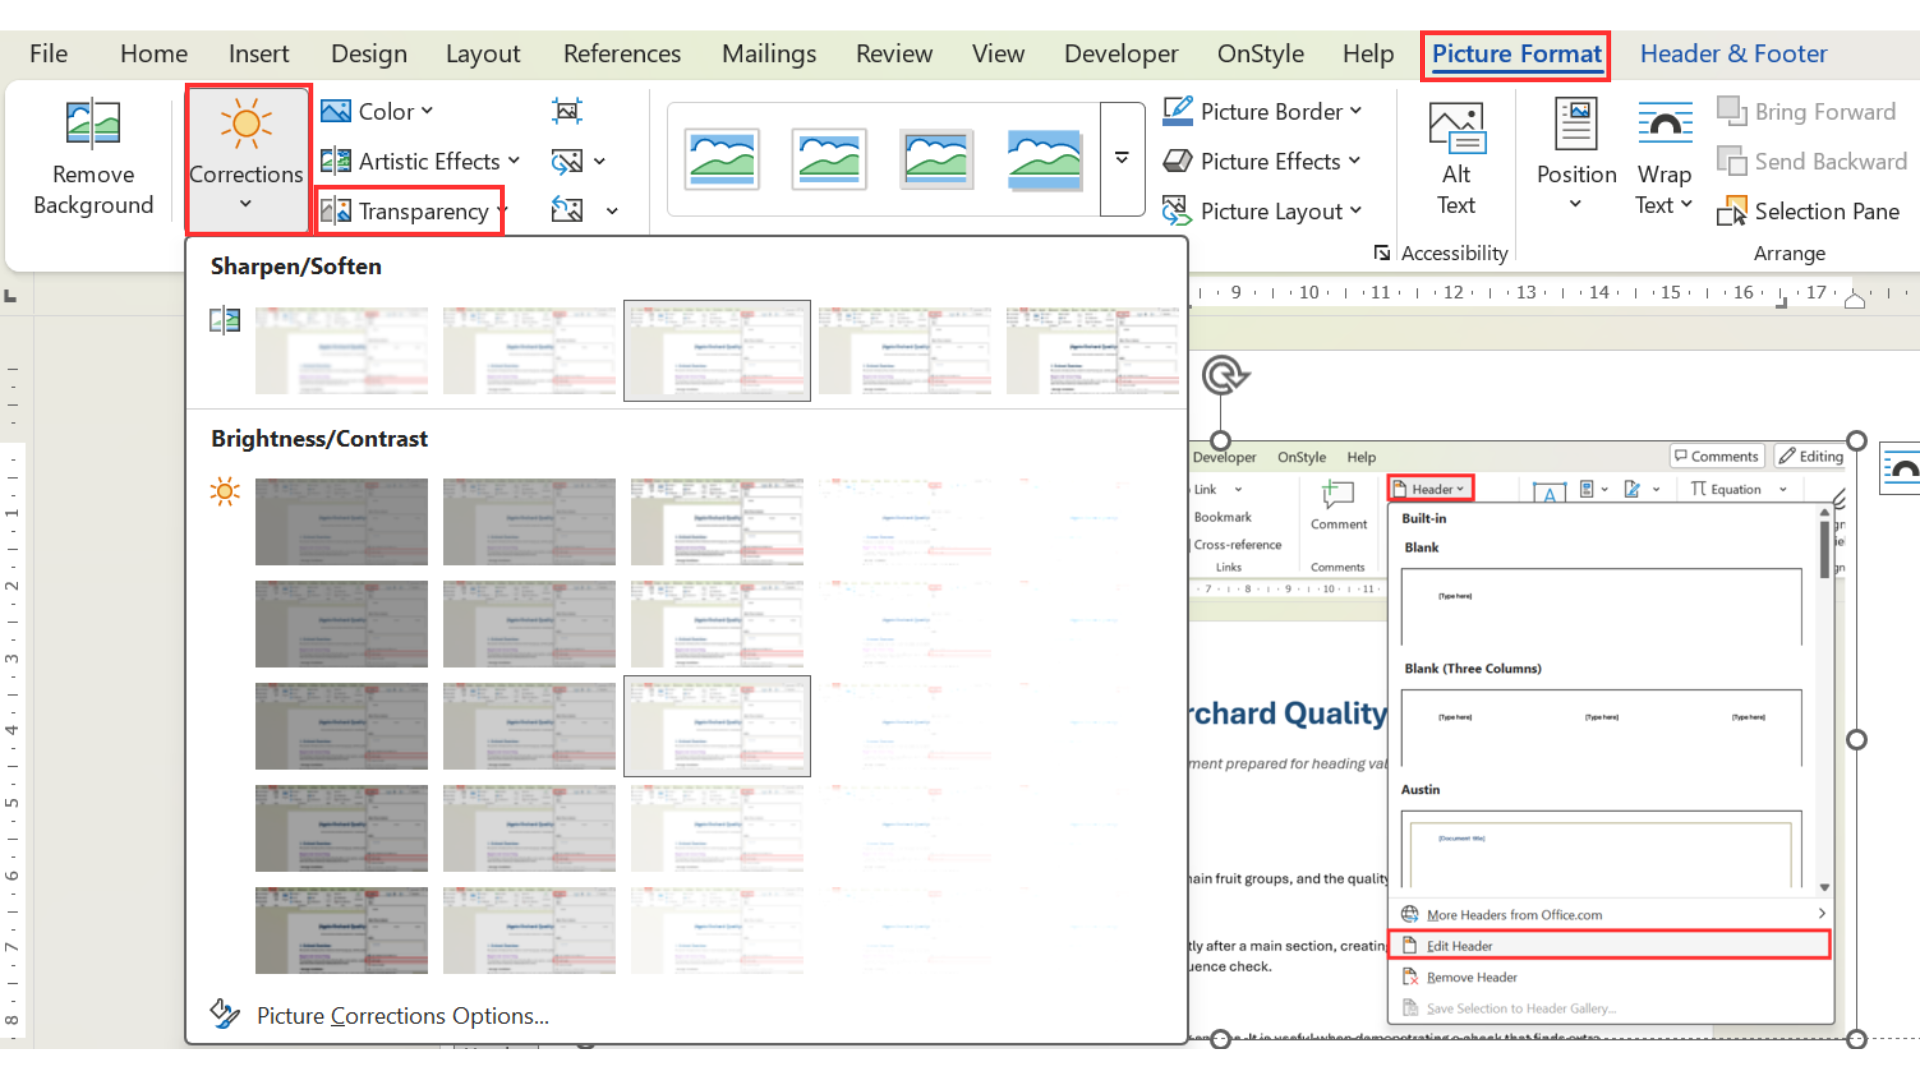
You can also use a cleaner image, choose a lighter picture, add transparency, or place important text inside a simple text box. Avoid placing small text directly over detailed parts of the image.
How to Apply a Background Image to Only the First Page
Section titled “How to Apply a Background Image to Only the First Page”For a cover page, invitation, or flyer, you may want the background image on only the first page. The header method can still be used, but you need to control which header receives the image.
Step 1: Open the header.
Double-click near the top of the first page or go to Insert, select Header, and choose Edit Header.
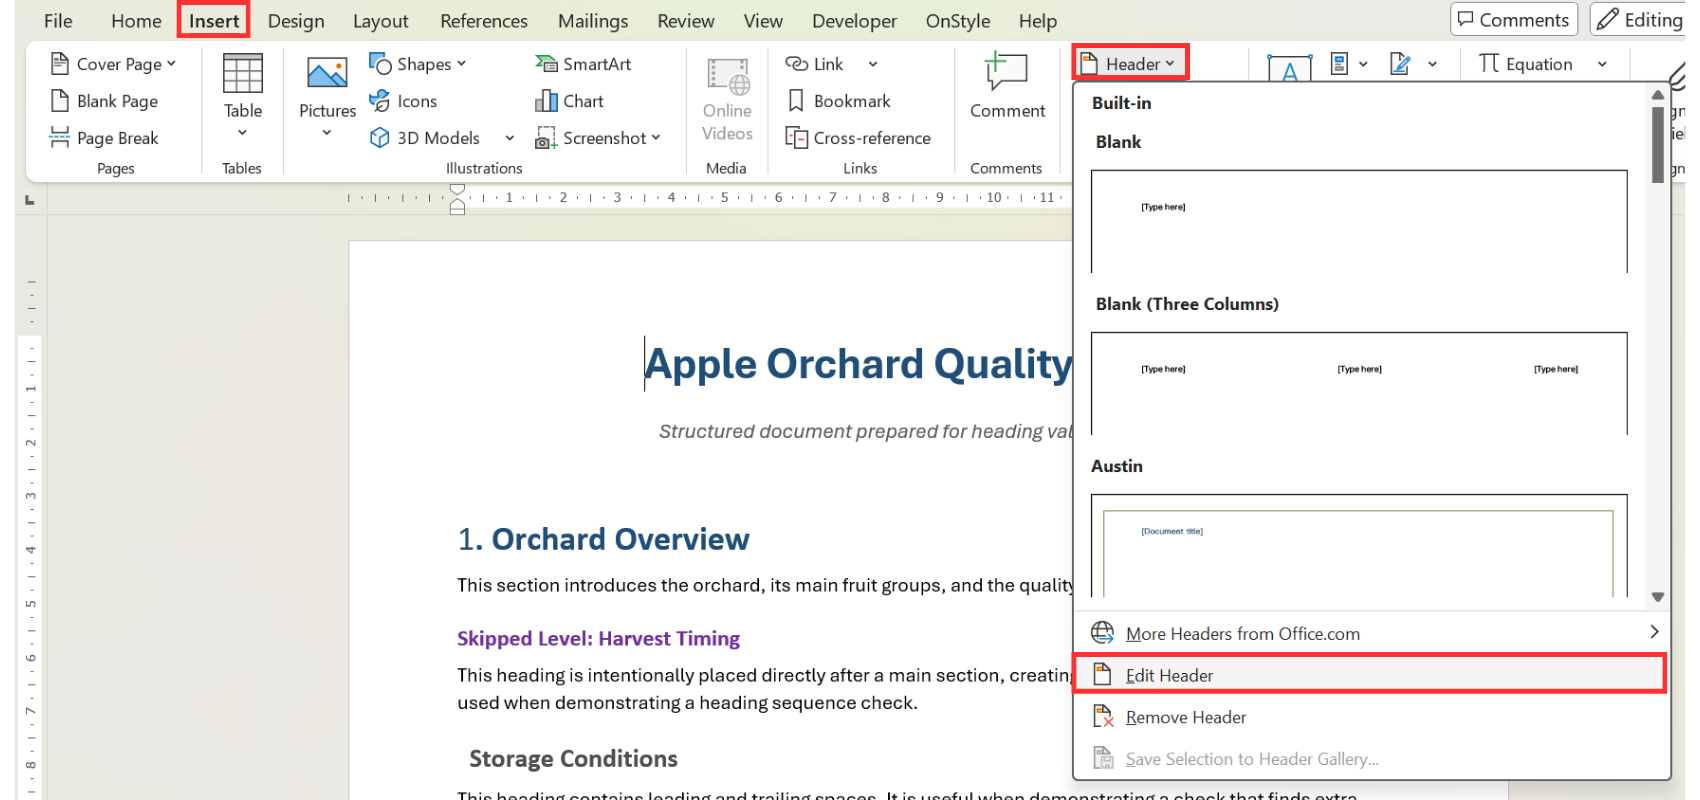
Step 2: Use a different first page header.
On the Header & Footer tab, enable Different First Page. This gives the first page its own header area.
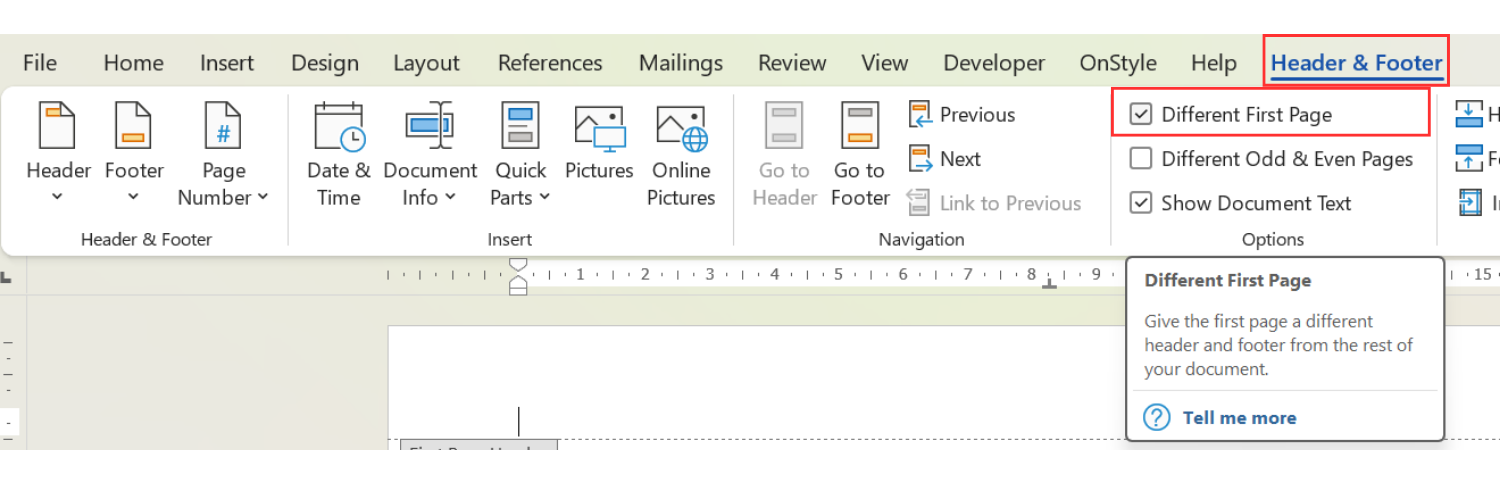
Step 3: Insert the background image in the first page header.
Insert the picture, set Wrap Text to Behind Text, and resize it to cover the page.
Step 4: Check the remaining pages.
Scroll through the document to confirm the background image appears only on the first page and not on the rest of the document.
How to Use Section Breaks for Different Page Backgrounds
Section titled “How to Use Section Breaks for Different Page Backgrounds”If different parts of the document need different background images, use sections. Section breaks let one part of the document have a different header from another part.
Step 1: Insert a section break.
Place the cursor where the new background area should begin. Go to the Layout tab, select Breaks, and choose Next Page.
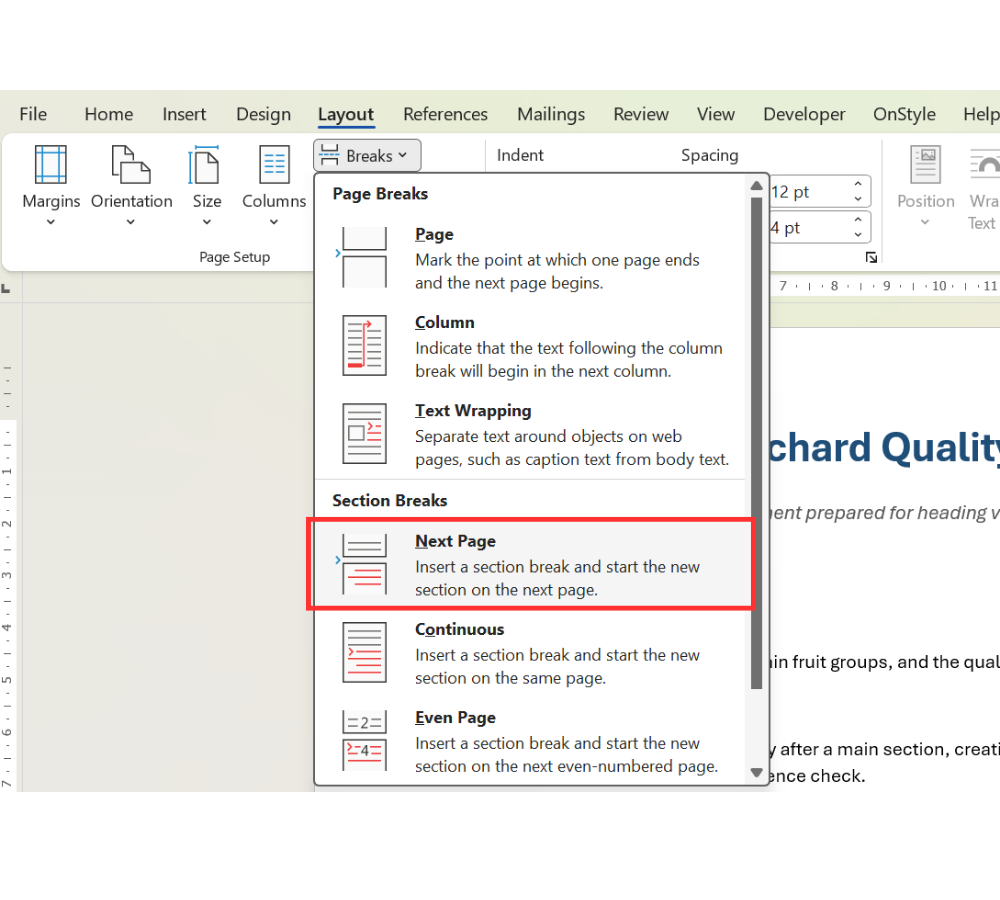
Step 2: Open the header in the new section.
Double-click near the top of the page in the new section.
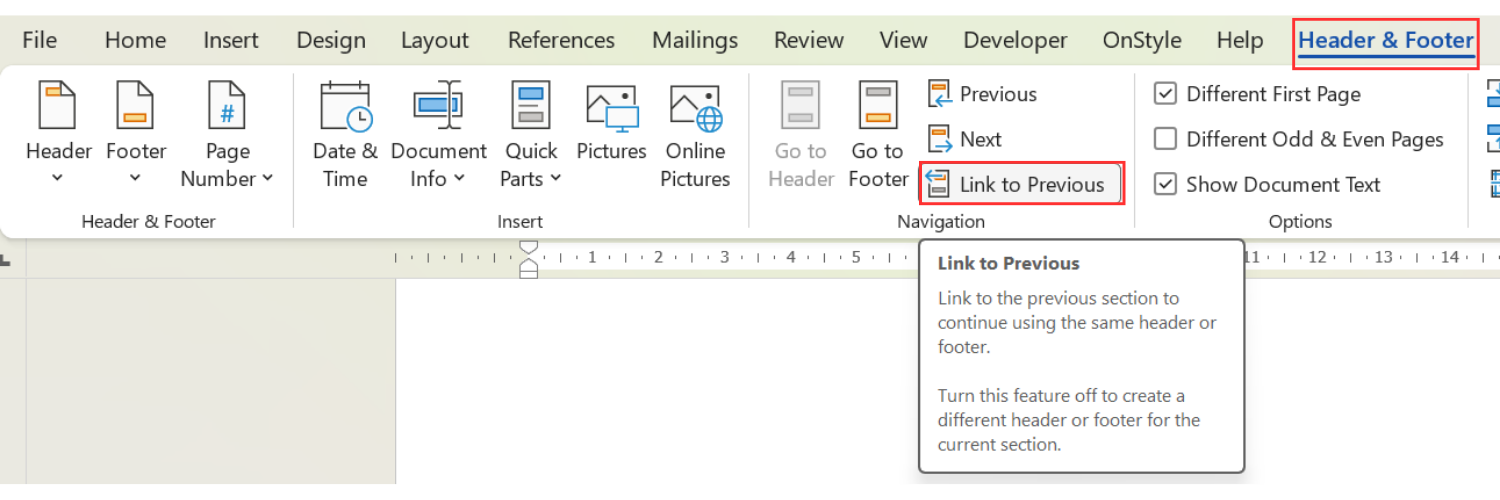
Step 3: Check header linking.
If the header is linked to the previous section, turn off the link before inserting a different background. This prevents the new background from changing the previous section.
Step 4: Insert the new background image.
Add the picture in the section header, set it Behind Text, resize it, and close the header when finished.
This is useful for longer documents, event programs, reports, or multi-section layouts where each section needs a different visual design.
Method 2: Use a Picture Watermark
Section titled “Method 2: Use a Picture Watermark”Word also has a faster way to add a background image by using the watermark feature. This is simpler than the header method, but it gives you less control over exact placement and full-page coverage.
Step 1: Open the watermark settings.
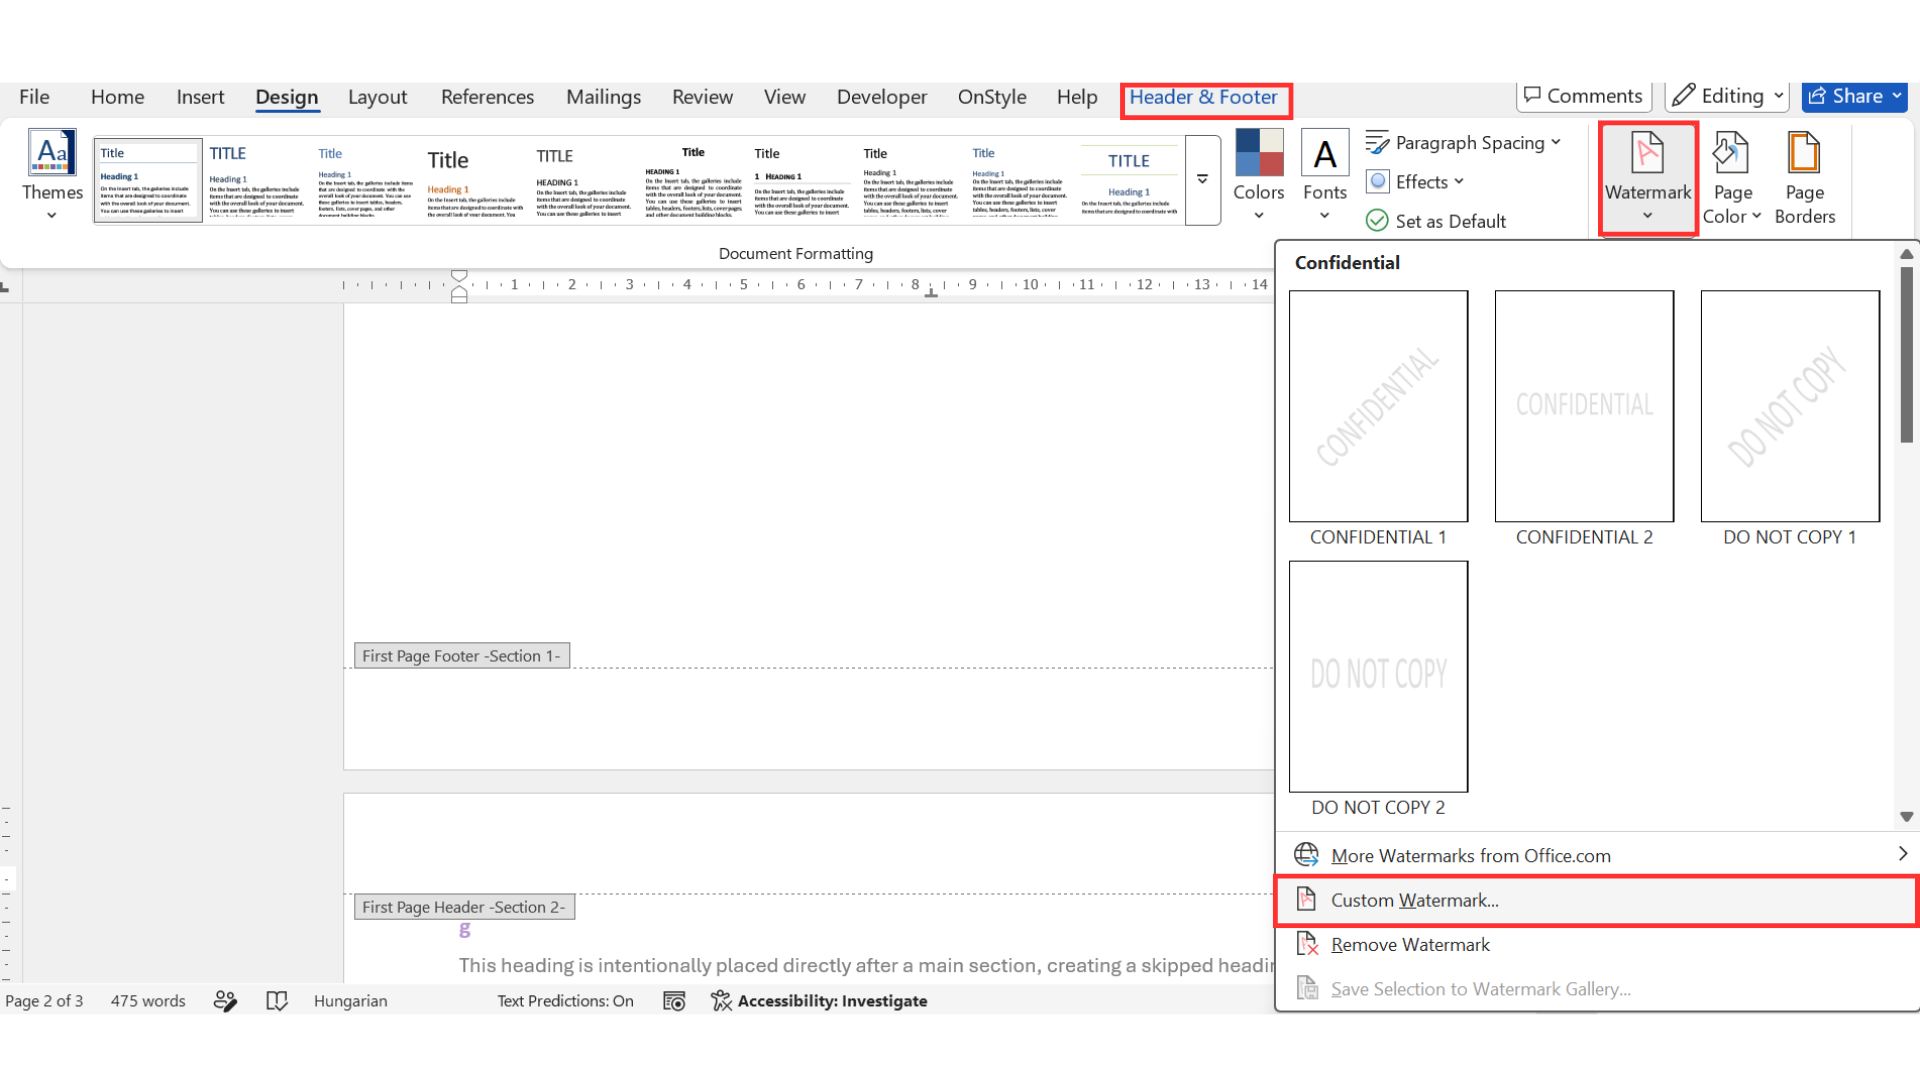
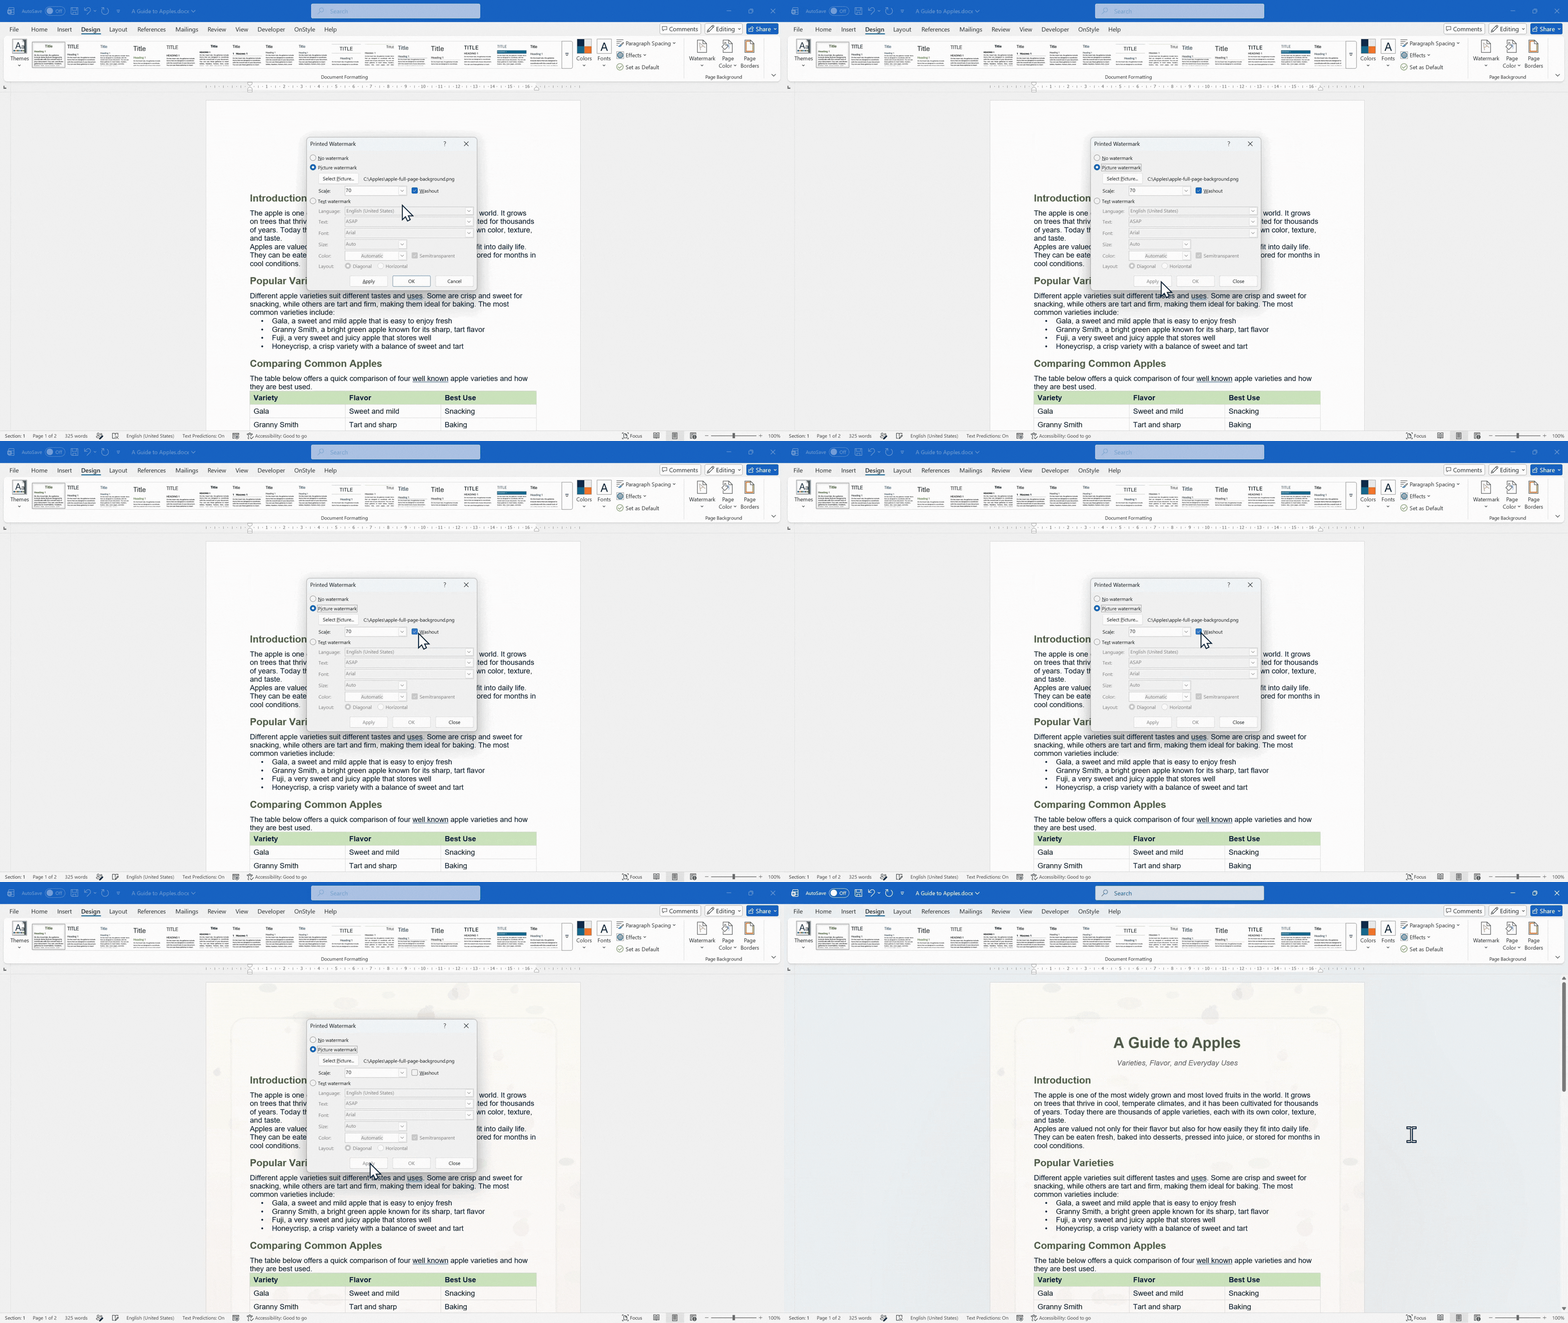
Go to the Design tab, select Watermark, and choose Custom Watermark.
Step 2: Choose a picture watermark.
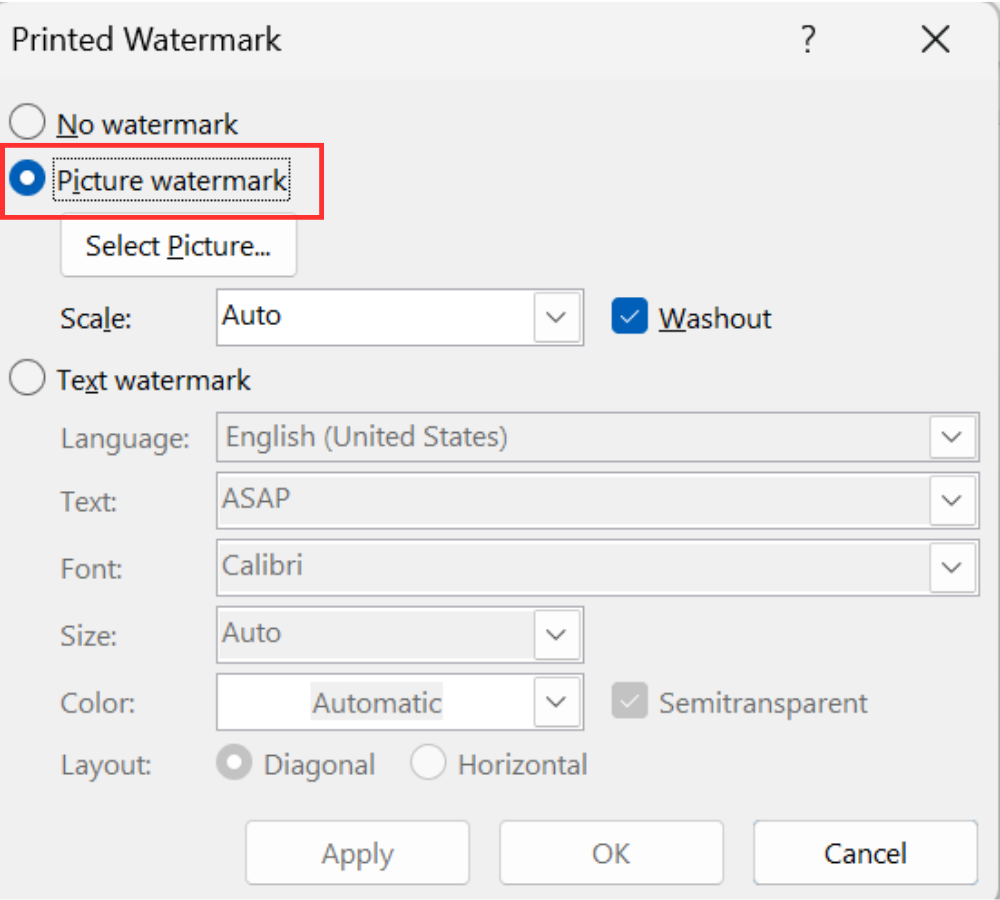
In the dialog box, select Picture watermark, then choose the image file you want to use.
Step 3: Adjust the scale.
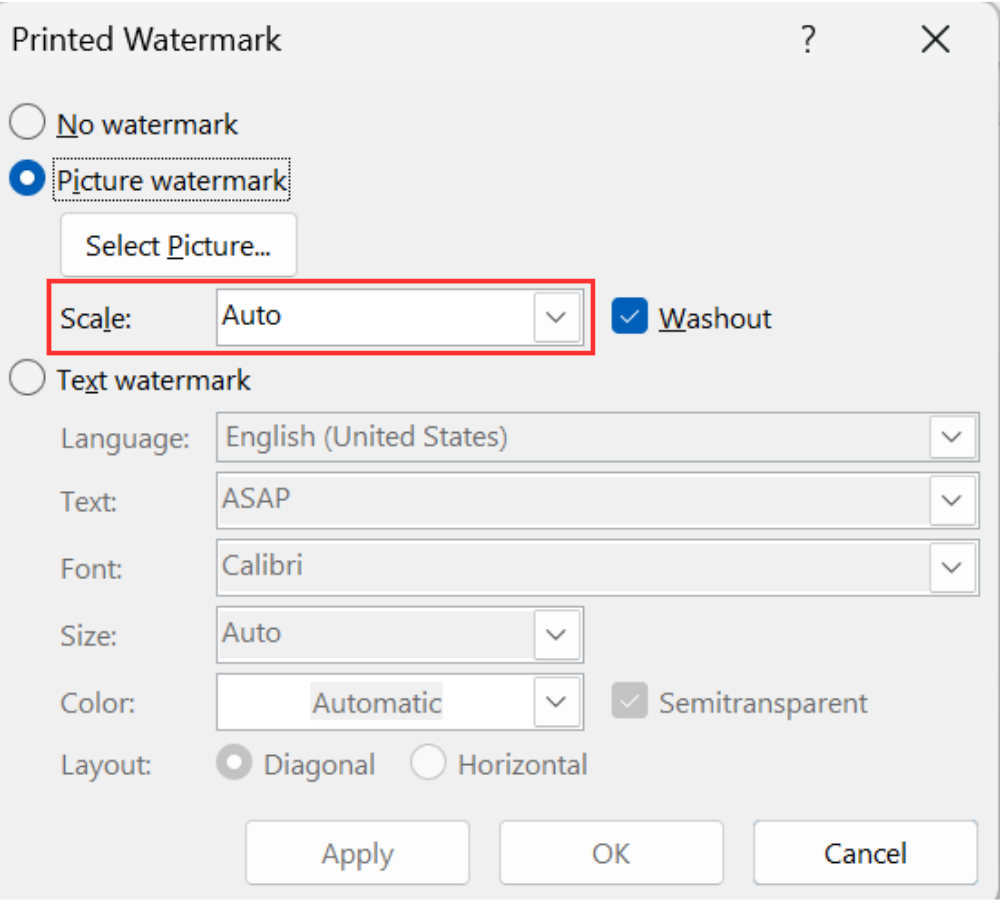
Use Scale to control the size of the image. The best scale depends on the image shape and the document size, so you may need to experiment.
Step 4: Preview the result.
Select Apply to see the change before closing the dialog box.
Step 5: Adjust the washout setting.
If the picture looks too faded or barely visible, uncheck Washout. If the picture is too strong behind the text, keep Washout enabled or use a softer image.
Step 6: Finish the watermark.
Select OK when the image looks right.
The picture watermark method is quick, but it is not always ideal for a true full-page design. For more control over size, cropping, and position, the header method is usually better.
When to Use the Header Method or Picture Watermark
Section titled “When to Use the Header Method or Picture Watermark”Both methods can add a picture behind text in Word, but they are best for different situations.
- Use the header method when you need a true full-page picture background, exact placement, edge-to-edge coverage, or better control over how the image sits behind the text.
- Use the picture watermark method when you need a quick background effect and do not need precise full-page positioning.
- Use section breaks when different parts of the document need different background images.
- Use Different First Page when only the first page should have the picture background.
Common Mistakes to Avoid
Section titled “Common Mistakes to Avoid”When learning how to insert a full-page background image in Microsoft Word, most problems happen because the image is layered, resized, or positioned incorrectly.
- Do not leave the image in front of the text. If the picture covers your words, select the image, go to Wrap Text, and choose Behind Text.
- Do not stretch the image using the side handles. Use the corner handles to keep the image proportional.
- Do not leave white edges around the page. Make the image slightly larger than the page if needed.
- Do not use a detailed image behind small text. Use a soft image, add transparency, or place the text in a clean text box.
- Do not forget that headers can be section-specific. If the background disappears or repeats unexpectedly, check the section headers.
Check the Background Before Printing or Exporting
Section titled “Check the Background Before Printing or Exporting”Before finishing the document, check how the background looks in print preview. Go to File, then Print, and review the preview carefully. Make sure the picture appears where expected, reaches the page edges, and does not make the text hard to read.
If you are sharing the document,export it as a PDF so the layout stays more consistent for other readers. This is especially useful for flyers, invitations, certificates, cover pages, and event handouts where the design should look the same on another device.
Best Uses for a Full-Page Background Image in Word
Section titled “Best Uses for a Full-Page Background Image in Word”A full-page picture background is most effective for visual documents with brief, easy-to-read text. Good use cases include:
- Flyers.
- Invitations.
- Event programs.
- Certificates.
- Cover pages.
- Report covers.
- School handouts.
- Recipe pages.
- Event guides.
For long documents with dense text, use backgrounds carefully. A subtle image or lighter design is usually easier to read than a detailed photo behind every paragraph.
Summary
Section titled “Summary”How to insert a full-page background image in Microsoft Word depends on the level of control you need. The header method is the most reliable option for a true full-page design because it lets the image sit behind the document text and cover the whole page. The picture watermark method is faster, but it gives you less control over exact placement and sizing.
The basic workflow is simple: open the header, insert the image, set Wrap Text to Behind Text, resize the picture to cover the page, improve readability if needed, and check the result before printing or exporting to PDF. For first-page-only or multi-section designs, use Different First Page or section breaks to control where the background appears.